

Applying Quikrete Concrete Resurfacer can give a worn-out driveway, patio, or walkway a fresh surface without tearing out the existing slab. It’s a practical fix when the concrete underneath is still structurally sound but looks rough, pitted, or flaking. The catch? The results depend almost entirely on how well you follow the prep and application steps, skip one, and the new layer can peel off within months.
At CHC Concrete, we’ve resurfaced hundreds of driveways, pool decks, and sidewalks across Fort Myers, Cape Coral, and the surrounding Southwest Florida communities. We know what makes a resurfacing job last and what causes it to fail, especially in our climate, where intense UV, heavy rain, and sandy subgrades put coatings to the test. That hands-on experience is exactly what shaped this guide.
Below, we’ll walk you through the full process: surface preparation, mixing ratios, application technique, and curing times. Whether you’re tackling this yourself or just want to understand what the job involves before calling a pro, you’ll have everything you need to make an informed decision.
Before you start: choose product, tools, timing
Rushing into a resurfacing project without the right materials or a proper plan is one of the most common reasons the job fails early. Before you open a bag of Quikrete Concrete Resurfacer, take 20 minutes to confirm you have the correct product for your surface, the tools to apply it properly, and a weather window that gives the material enough time to cure without interruption.
Pick the right Quikrete product
Not all resurfacers are identical. Quikrete Concrete Resurfacer (No. 1131) is the standard product for worn flatwork at application thicknesses up to 1/2 inch, covering roughly 200 square feet per 40-lb bag at a 1/8-inch depth. If you need faster return to service or you’re working in sections that will see foot traffic the same day, Quikrete Fast-Setting Concrete Resurfacer cuts cure time significantly. For most homeowners resurfacing a driveway or patio, the standard product works well and is easier to find at local home improvement stores.
If your slab has cracks wider than 1/4 inch or any structural damage underneath, resurfacer alone will not fix the root problem. Repair those issues first before any coating goes on top.
Gather your tools before mixing
Once you mix a batch of resurfacer, you have roughly 20 to 30 minutes of working time before it stiffens. That means every tool needs to be staged and ready before water touches the powder. Here’s what you’ll need on hand:
- Pressure washer (minimum 3,000 PSI) or stiff scrub brush with a garden hose
- Concrete cleaner or degreaser for oil and grease stains
- Drill with a paddle mixer bit, or a rented mortar mixer for larger slabs
- 5-gallon bucket for mixing smaller batches
- Long-handled squeegee, 18 to 24 inches wide
- Stiff-bristle push broom for adding texture
- Plastic sheeting or burlap for the curing stage
Time your project around the weather
Following proper Quikrete concrete resurfacer instructions means respecting temperature and moisture conditions. Ideal working conditions fall between 50°F and 90°F, with no rain expected for at least 24 hours after you apply the product. In Southwest Florida, that often means scheduling an early morning start, since afternoon heat and high humidity can accelerate surface drying before the resurfacer has properly bonded. Applying the product in direct afternoon sun is a fast way to end up with a surface that cracks or peels within the first season.
Step 1. Prep the old concrete for a strong bond
Surface prep is the most critical step in the entire process. Quikrete concrete resurfacer instructions are clear on this point: the resurfacer bonds through a mechanical connection with the existing concrete, and anything sitting between those two surfaces, whether dirt, oil, loose material, or standing water, will break that bond. You can mix perfectly and apply cleanly, but if the prep was sloppy, you’ll be peeling up chunks within a year.
Clean the surface thoroughly
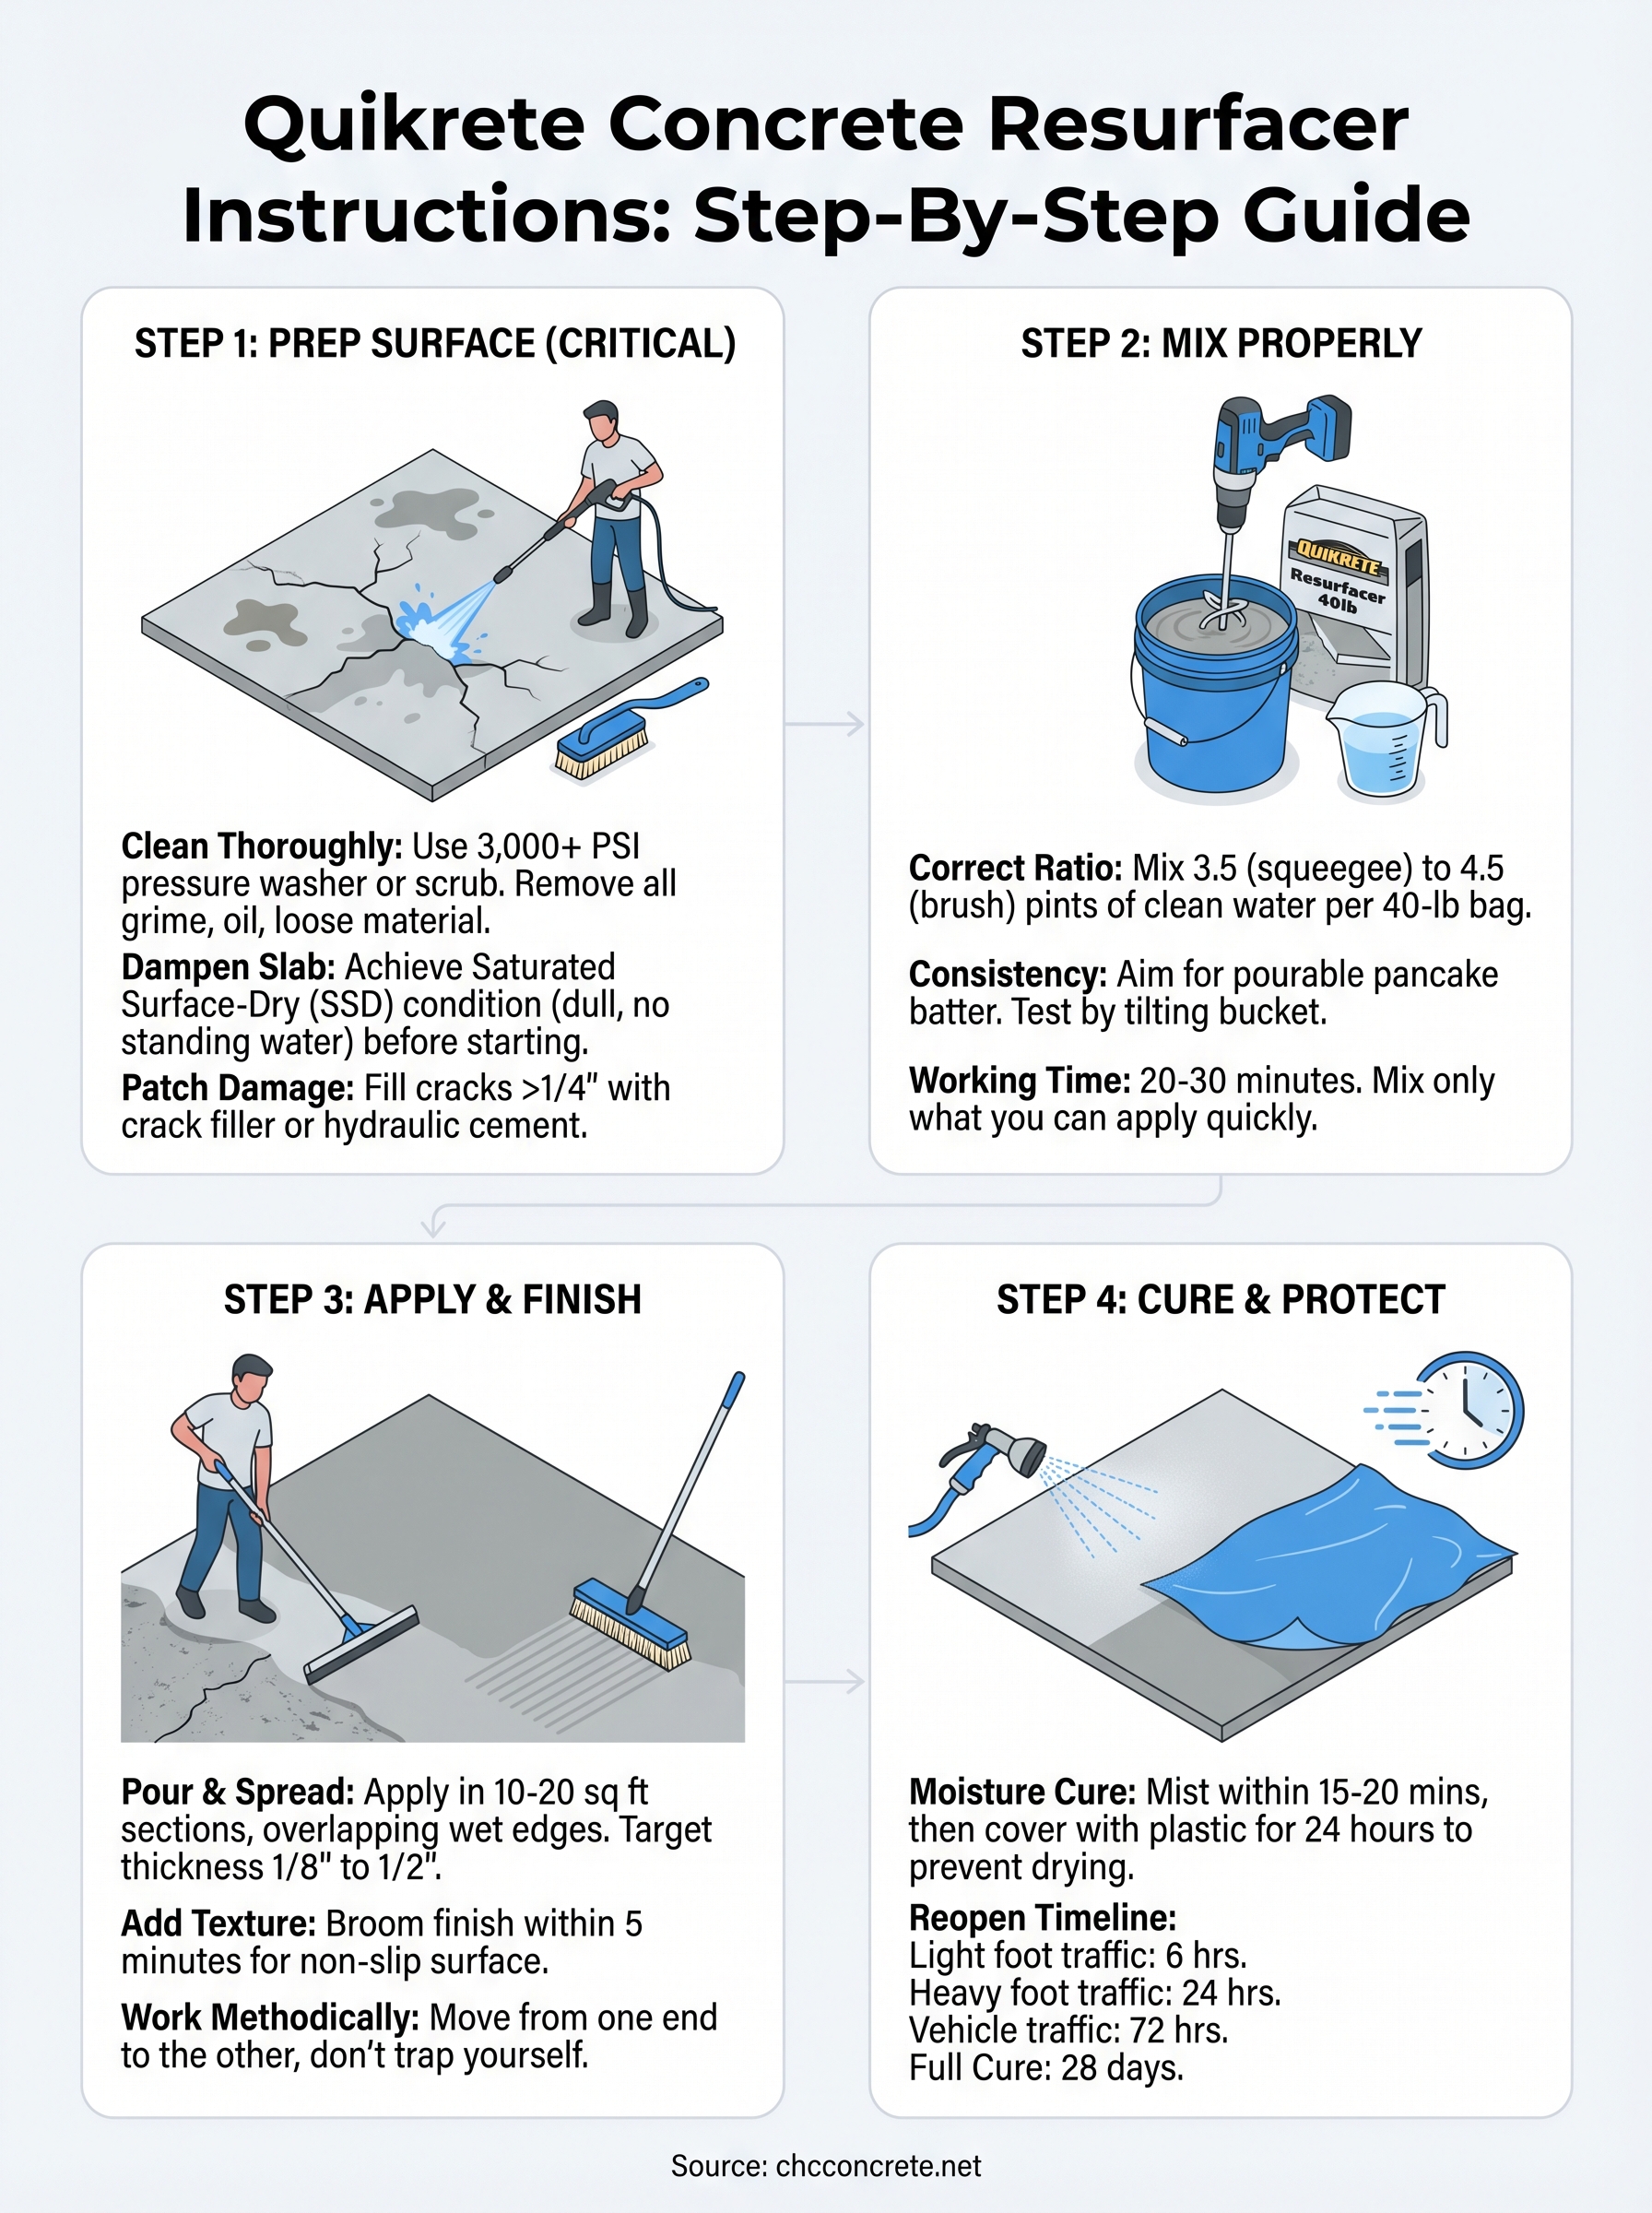
Start with a pressure washer set to at least 3,000 PSI and work the entire slab in overlapping passes. Pay extra attention to corners, expansion joints, and any areas with visible grime buildup. For oil or grease stains, apply a concrete degreaser 10 to 15 minutes before washing to lift residue that water pressure alone cannot remove.
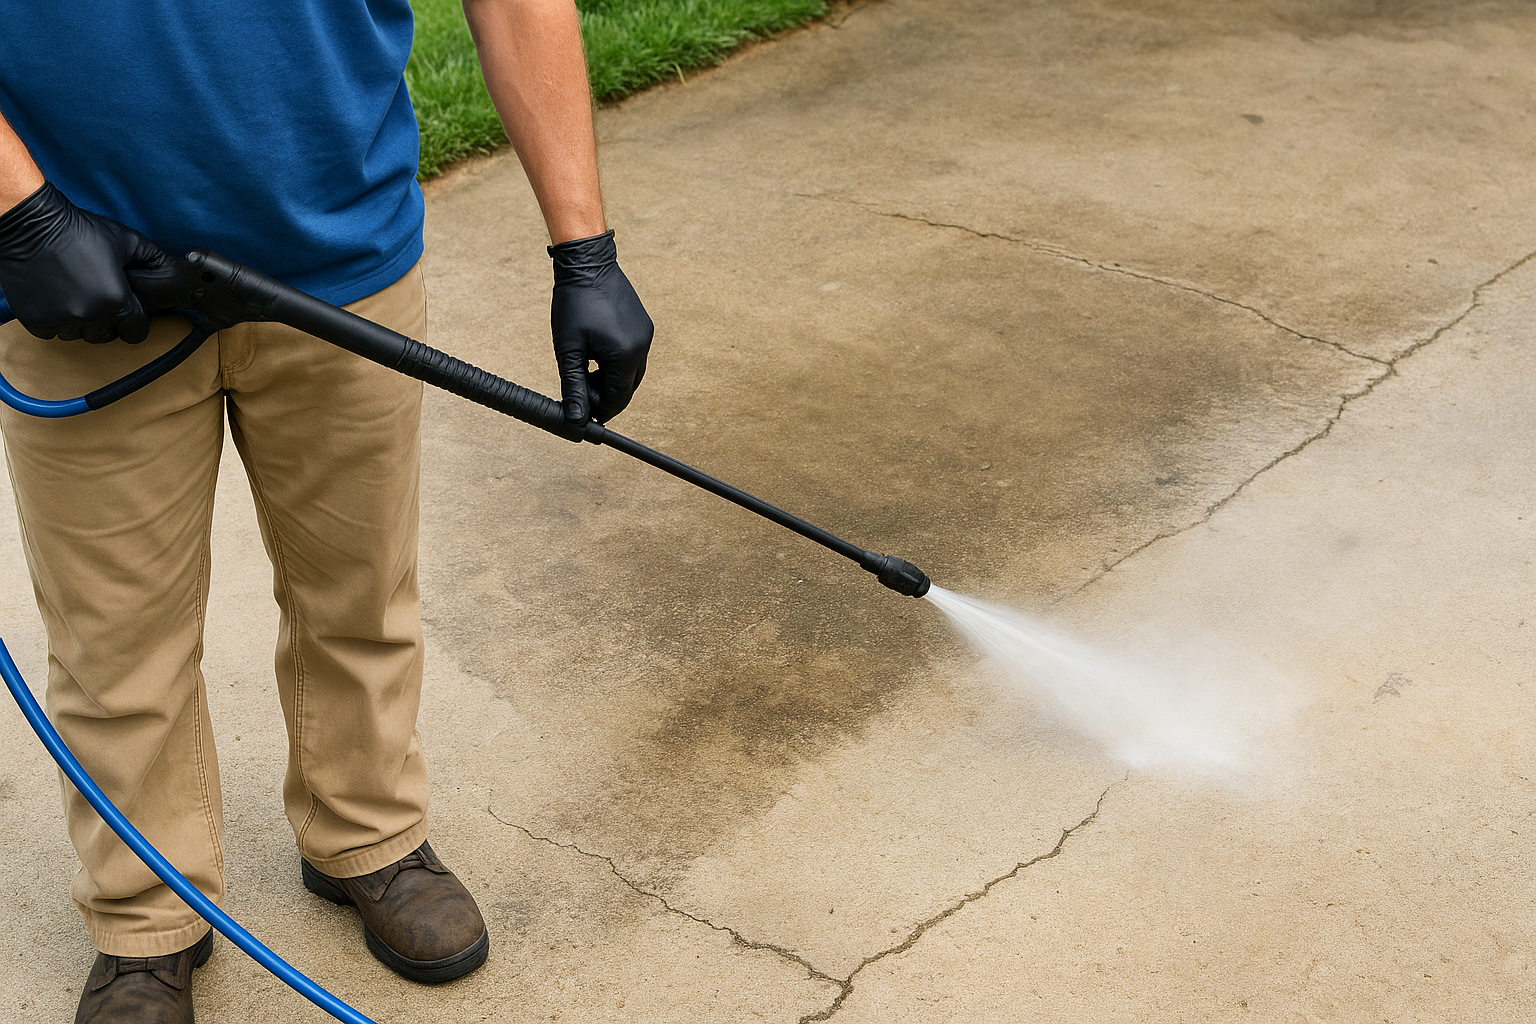
Do not apply resurfacer to a dry slab. The concrete must be damp but have no standing water sitting on top when you begin.
After washing, give the surface 30 to 60 minutes to reach a saturated surface-dry (SSD) condition. SSD means the concrete has absorbed moisture but the top looks dull rather than wet. This condition prevents the slab from pulling water out of the resurfacer too quickly, which weakens the final bond strength between layers.
Fill cracks and patch damage first
Cracks wider than 1/4 inch need to be filled with a concrete crack filler before you apply resurfacer. Use Quikrete Concrete Crack Seal or hydraulic cement for deeper voids, and let it cure fully according to the product label. Resurfacer is a coating, not a structural repair material, and applying it over an untreated crack will cause the same crack to reflect back through the new surface.
Step 2. Mix Quikrete resurfacer to the right consistency
Getting the mix right determines whether the resurfacer flows and bonds properly or stiffens before you can spread it evenly. Quikrete concrete resurfacer instructions specify a water-to-powder ratio that produces a pourable but not watery consistency, and hitting that target matters more than most people expect on a first application.
Use the right water-to-powder ratio
The standard mixing ratio for Quikrete Concrete Resurfacer is 3.5 pints of clean water per 40-lb bag for a standard squeegee application. For a thinner, brush-applied finish, you can add up to 4.5 pints per bag, but do not exceed that amount or the mix loses bond strength. Use cold or room-temperature water; hot water accelerates the set time and shortens your working window.
| Application Method | Water per 40-lb Bag |
|---|---|
| Squeegee (standard flatwork) | 3.5 pints |
| Brush or broom finish | 4.0 to 4.5 pints |
Mix the powder and water in a 5-gallon bucket using a drill with a paddle mixer bit for at least two full minutes until smooth and free of lumps. Mix only as much as you can apply in a single 20-minute window.
Never add extra water to a batch that has started stiffening. Retempering the mix weakens the final bond and reduces the resurfacer’s performance.
Check consistency before you spread
Before you carry the bucket to the slab, tilt it and watch how the mix moves. Properly mixed resurfacer flows slowly, similar to thick pancake batter. If it runs out fast and thin, fold in a small amount of dry powder. If it barely shifts, add a tablespoon of water at a time and re-mix for 60 seconds before testing again.
Your working time after mixing runs only 20 to 30 minutes in normal conditions, and even less on a hot Florida afternoon. Mix batches sized to match the area you can cover in one continuous pass rather than mixing a large batch that begins setting before you finish spreading it.
Step 3. Apply the resurfacer and finish it cleanly
With your slab damp and your mix ready, you need to move with purpose. Application speed and method directly affect how well the resurfacer bonds and how consistent the finished surface looks. Work in sections no larger than 10 to 20 square feet at a time, which keeps you within your 20-minute working window before the material starts to firm up.
Pour and spread in manageable sections
Pour the mixed resurfacer directly onto the damp concrete and spread it immediately using your long-handled squeegee. Push the material in one direction, then pull it back across the same area to ensure even coverage. The target thickness for a single pass is between 1/8 inch and 1/2 inch, staying closer to 1/8 inch for cosmetic work and up to 1/2 inch only where the old surface has significant pitting or low spots.
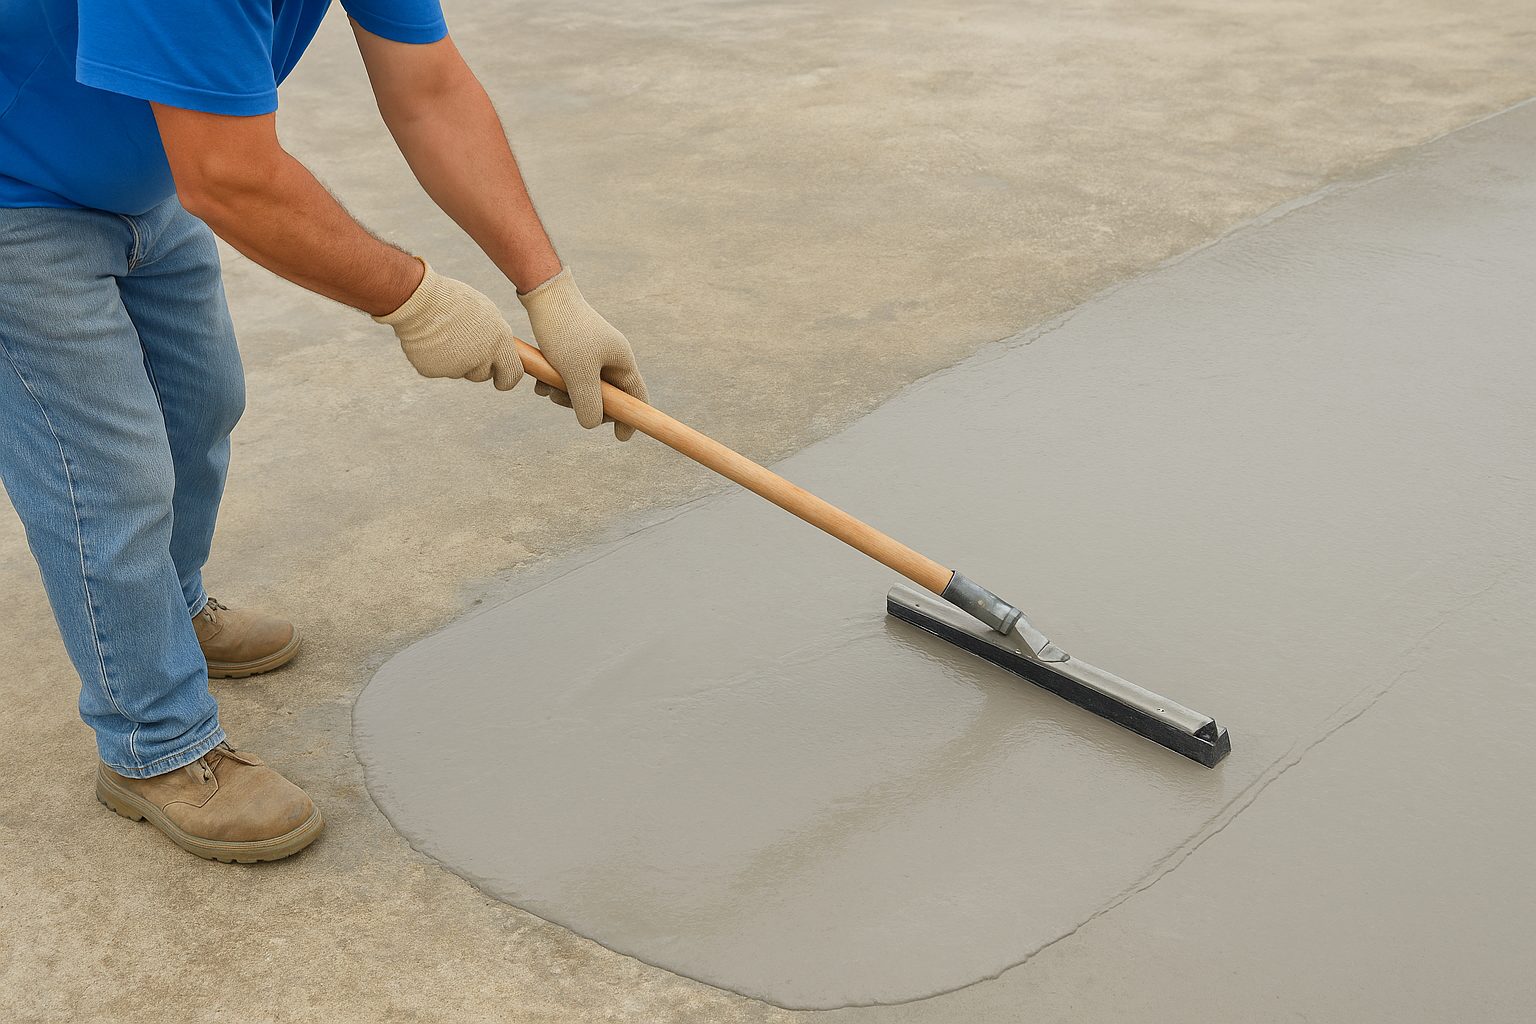
Quikrete concrete resurfacer instructions call for working edges wet, meaning you should always overlap each new section into the still-wet edge of the previous one to prevent visible seams.
Move methodically from one end of the slab toward the other so you are never stepping back onto freshly applied material or trapping yourself in a corner with no exit path.
Add texture before the surface sets
Once you finish spreading a section, draw a stiff-bristle push broom lightly across the surface in one smooth, consistent direction. This creates a non-slip texture that matters especially on pool decks, steps, and outdoor walkways. Aim to add texture within 5 minutes of spreading each section, before the resurfacer begins to firm up and resist the broom.
Step 4. Cure, protect, and reopen the surface to use
Curing is the step most homeowners rush, and it’s where many otherwise solid resurfacing jobs fall apart. Quikrete concrete resurfacer instructions are specific: the material needs consistent moisture and stable temperature during the first 24 hours to develop its full bond strength. Skipping or shortening this stage leaves you with a surface that looks fine at first but starts to dust, crack, or delaminate within a few months.
Keep moisture in during the initial cure
Begin the curing process within 15 to 20 minutes of finishing your final broom texture pass. Lightly mist the entire surface with water from a garden hose using a gentle spray setting; you are not washing the surface, just dampening it to slow moisture loss. Then cover the slab with plastic sheeting or burlap to hold that moisture in place. In direct Florida sun, uncovered resurfacer can lose surface moisture within minutes, which stops the curing reaction before the material reaches its rated strength.
Reapply a light mist every 4 to 6 hours during the first day if you are not covering the slab with sheeting.
Know when it’s safe to use the surface again
Reopening the surface too early is a quick way to damage work you just spent hours completing. Use the following timeline as your guide:
| Activity | Minimum Wait Time |
|---|---|
| Light foot traffic | 6 hours |
| Heavy foot traffic | 24 hours |
| Vehicle traffic (cars, trucks) | 72 hours |
| Full cure for sealing or coating | 28 days |
Cooler temperatures and high humidity will extend these times, so check conditions before reopening the area to traffic.
Finish strong
Following the quikrete concrete resurfacer instructions from surface prep through curing gives you a surface that holds up for years rather than one that peels apart before the first rainy season ends. Every step in this guide builds on the one before it: poor prep kills the bond, rushing the cure kills the strength, and skipping the texture leaves you with a slip hazard. Get all four stages right, and you end up with a clean, durable surface that looks like new work.
That said, some slabs have deeper issues that resurfacer alone cannot fix, including structural cracks, drainage problems, or severely spalled areas that need professional attention before any coating goes on top. If your project falls into that category, or if you just want the job done right the first time without the guesswork, the team at CHC Concrete is ready to help. Contact us for a free estimate and we’ll assess your slab and recommend the best path forward.