


Stamped concrete looks great until it doesn’t. After a few years of Southwest Florida’s relentless sun, heavy rain, and foot traffic, that once-vibrant surface starts to fade, peel, and lose its protective layer. Knowing how to reseal stamped concrete at the right time is what keeps it looking sharp and structurally sound, instead of turning into an expensive replacement project.
At CHC Concrete, we install and maintain stamped concrete across Fort Myers, Cape Coral, Estero, and Bonita Springs. We see firsthand what happens when resealing gets skipped or done wrong, white haze, bubbling, premature flaking, and most of it comes down to avoidable mistakes during prep or application. That hands-on experience is exactly what shaped this guide.
Below, we’ll walk you through the full process step by step: when to reseal, how to choose the right sealer, how to prep the surface properly, and the common pitfalls that trip up most DIYers. Whether you plan to tackle it yourself or just want to understand what a contractor should be doing, this guide gives you the knowledge to get it right.
Before you reseal: timing, tests, and safety
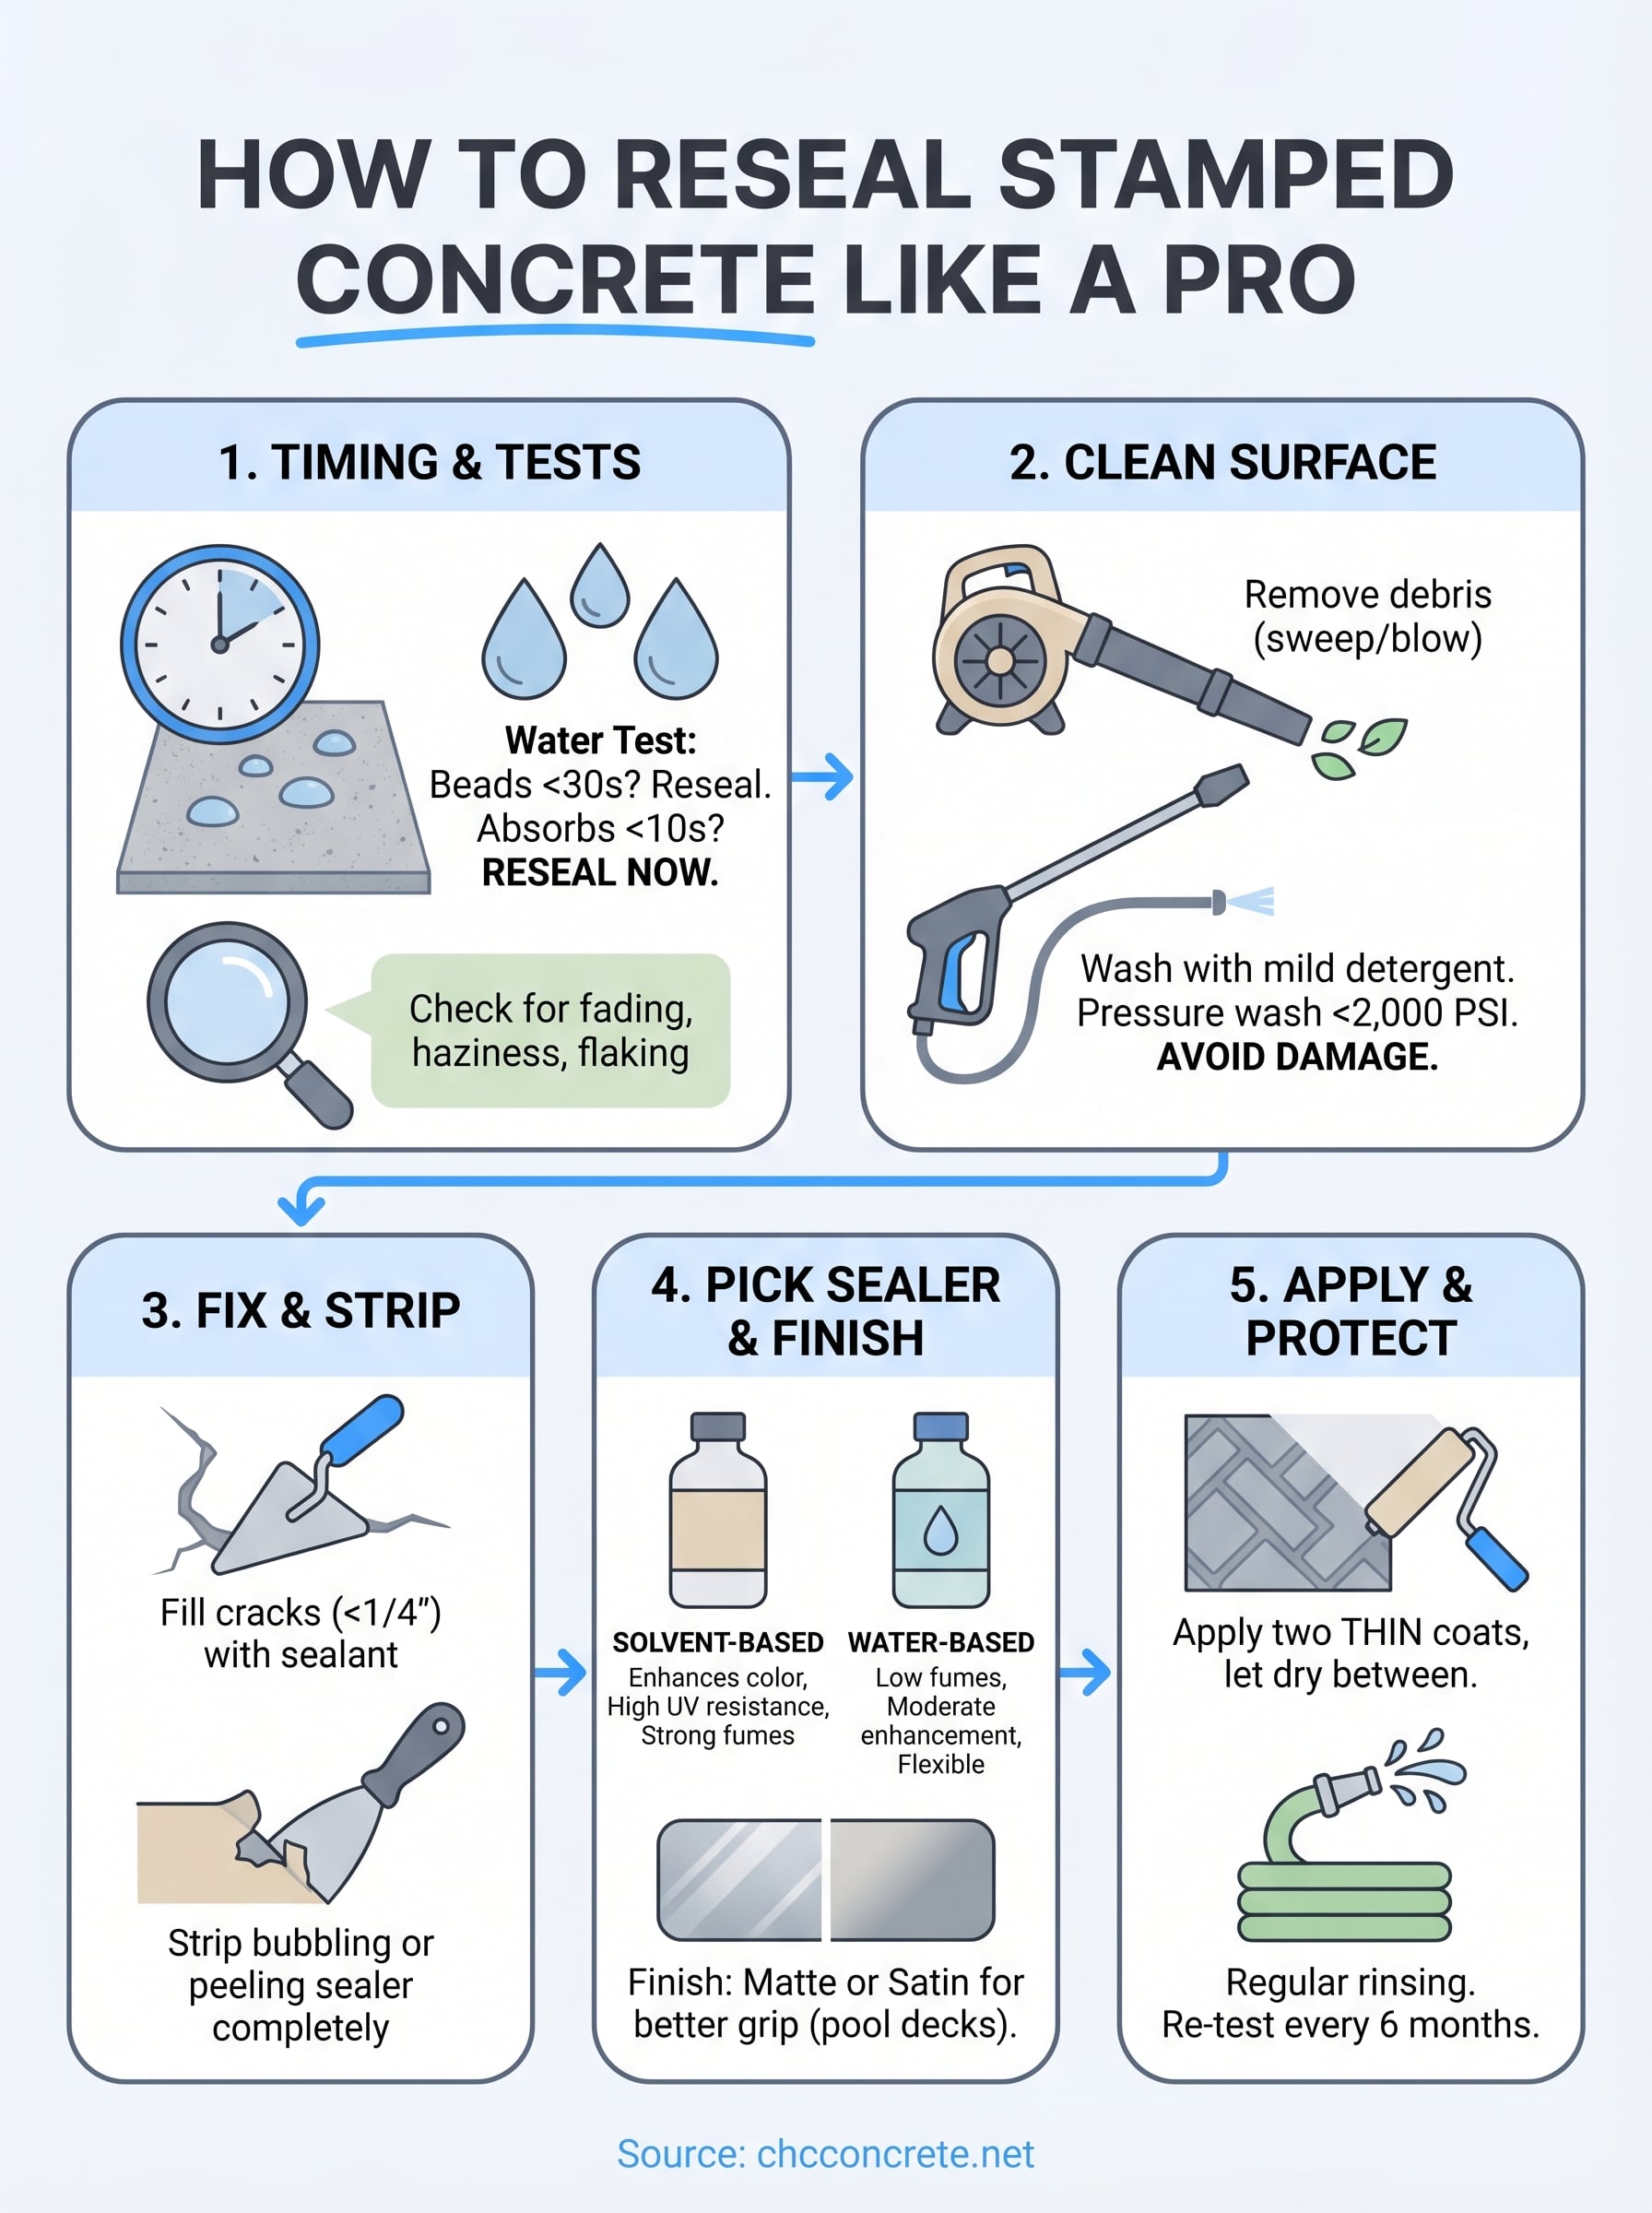
Most people searching for how to reseal stamped concrete start with the application itself, but timing and prep are what determine whether the job holds up. In Southwest Florida, intense UV radiation, heavy rainfall, and constant heat wear down sealers faster than in cooler climates. Jumping in too early or too late both cause problems, so before you touch a brush or roller, check where your surface actually stands.
Know when your sealer needs replacing
The clearest signs your sealer is failing are visible fading and white or gray haziness, plus surface flaking where the coating peels away from the concrete. You might also notice that the color of the stamped pattern looks duller than it used to, even after rain. In Florida, foot traffic on pool decks and patios accelerates this wear, so inspect your surface at least once a year and plan for resealing every two to three years at most.
If you see bubbling or widespread peeling, a simple recoat will not fix it. You need to strip the old sealer completely before applying anything new.
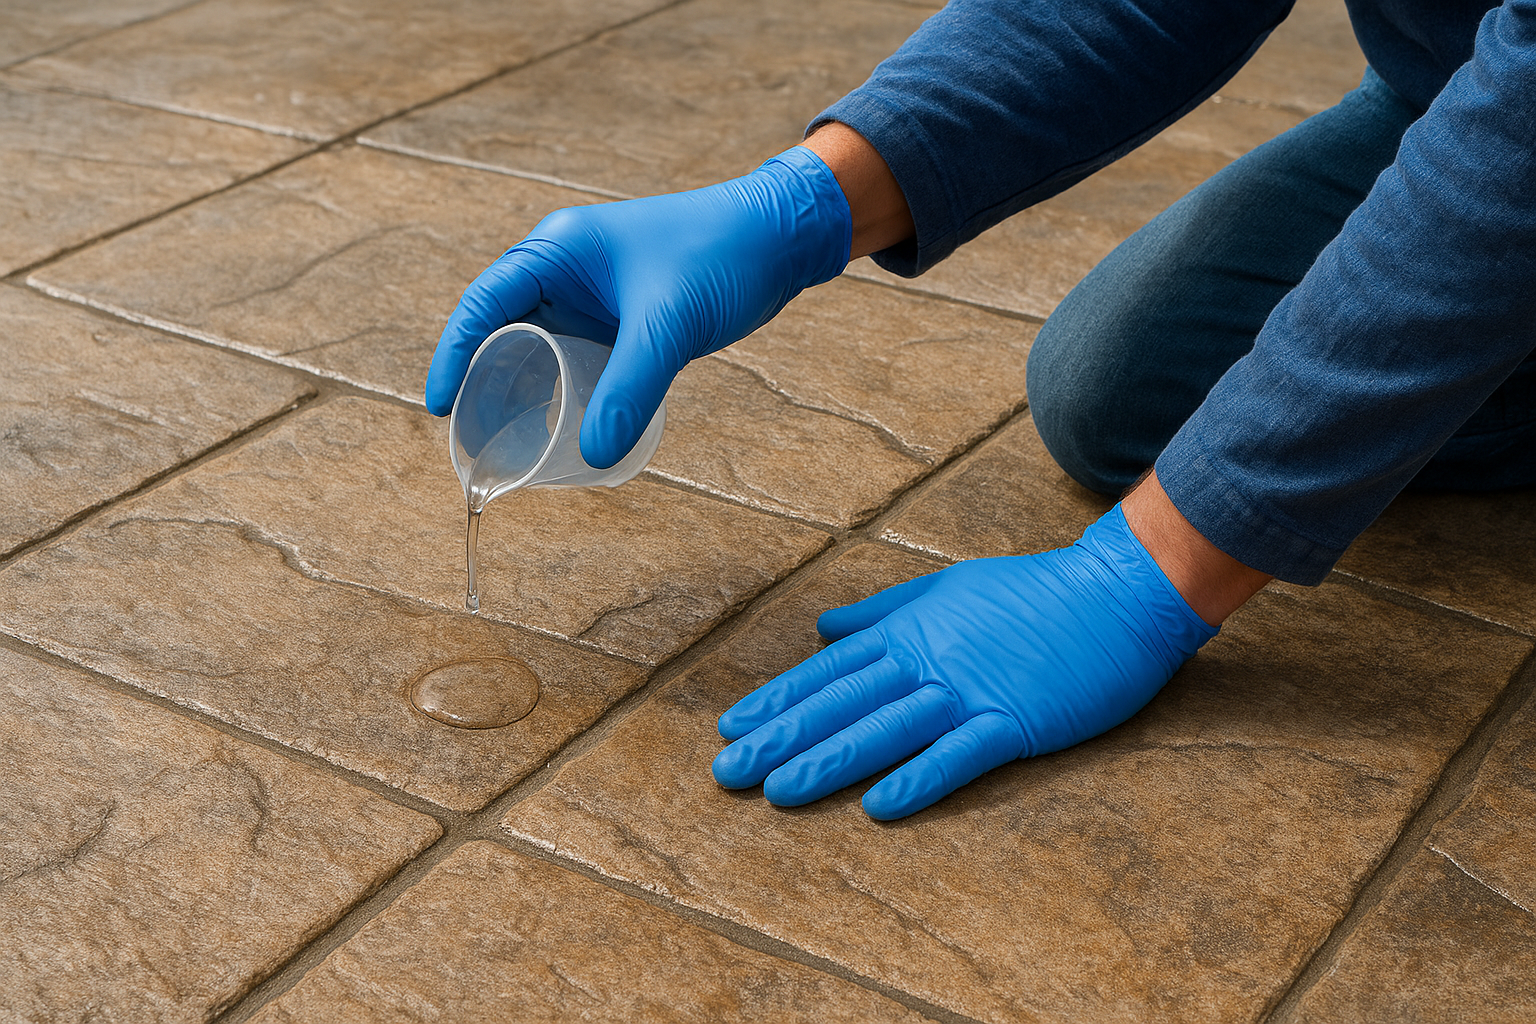
Run a simple water test
One of the fastest ways to confirm your sealer’s condition is the water bead test. Pour a small amount of water onto the concrete surface, then use this quick reference guide to read what happens:
| Water behavior | What it means |
|---|---|
| Beads up for 30+ seconds | Sealer is still working |
| Partially absorbs within 15 seconds | Sealer is near the end of its life |
| Absorbs in under 10 seconds | Reseal now |
Gather your safety gear first
Before you open any sealer product, set up your safety equipment. Most concrete sealers, especially solvent-based ones, release strong fumes that cause dizziness and respiratory irritation with extended exposure. Wear chemical-resistant gloves and eye protection, and make sure your work area has strong airflow. Have everything below ready before you start:
- Organic vapor respirator (not just a dust mask)
- Chemical-resistant gloves
- Safety glasses or goggles
- Portable fans for enclosed or low-airflow spaces
Step 1. Clean the concrete without damaging it
Cleaning is not optional prep, it’s what makes the sealer bond properly. Dirt, algae, mildew, and pool chemicals sitting on the surface will lock under the new sealer and cause it to fail within months. In Southwest Florida, biological growth builds up fast in shaded areas, so treat this step seriously before you move forward with how to reseal stamped concrete.
Remove loose debris and surface dirt
Start by sweeping or blowing off any loose debris with a leaf blower or stiff-bristle broom. Get into the textured grooves of the stamped pattern, since debris collects there and blocks adhesion. Once the dry material is cleared, focus on these three areas before washing:
- Grout lines and stamp impressions
- Edges along walls or pool copings
- Low spots where water and organic material settle
Wash the surface without stripping it
Use a concrete-safe degreaser or mild detergent mixed with water, then scrub any stained or discolored areas with a stiff brush. A pressure washer set between 1,200 and 1,500 PSI works well for the main surface, but keep the nozzle moving and stay at least 12 inches away from the concrete.
Never exceed 2,000 PSI on stamped concrete. High pressure erodes the texture and opens the surface to moisture penetration before you apply a single drop of sealer.
After washing, allow the concrete to dry completely, which typically means 24 to 48 hours given Florida’s humidity levels.
Step 2. Fix cracks and remove failing sealer
Skipping crack repair before resealing is one of the most common mistakes in the process of how to reseal stamped concrete. Sealer fills surface texture, not structural damage. If you coat over cracks or peeling layers, moisture traps underneath and the new sealer fails within one season.
Fill cracks before applying anything
Inspect the entire surface for cracks wider than a hairline. For cracks under 1/4 inch wide, use a concrete crack filler or polyurethane caulk rated for exterior use. Apply it with a caulk gun, press it firmly into the crack, and tool the surface flat with a putty knife. Let it cure fully according to the product label before moving on.
Do not use hydraulic cement or grout in surface cracks on stamped concrete. Both materials dry rigid and will crack again quickly under Florida’s thermal expansion cycles.
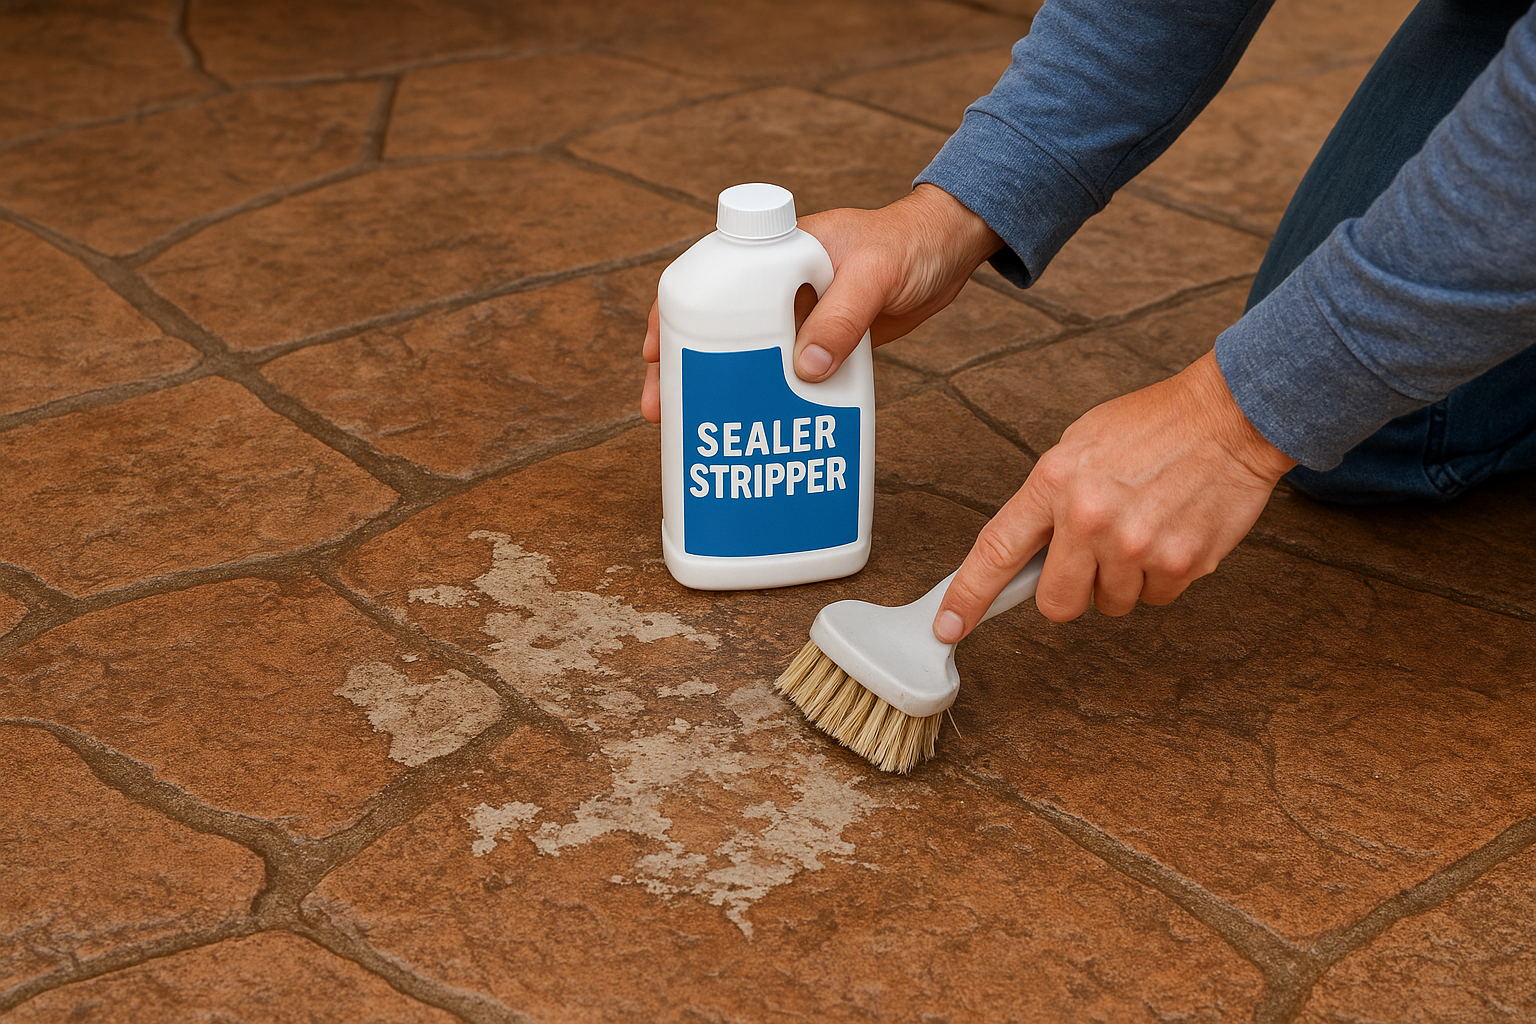
Strip failing sealer completely
If you identified widespread bubbling or peeling during your inspection, you need to remove the old sealer before recoating. Apply a xylene-based or chemical sealer stripper to the affected areas, let it dwell for the time listed on the label, then scrub the surface aggressively with a stiff brush. Rinse thoroughly with clean water and allow the concrete to dry completely before proceeding to sealer selection. Partial stripping leads to uneven adhesion and patchy results.
Step 3. Pick a compatible sealer and finish
Choosing the right sealer is a critical decision in how to reseal stamped concrete, and the wrong product will fail regardless of how well you prepped. Two main categories exist: solvent-based and water-based sealers. Each performs differently depending on your surface condition, sun exposure, and how much foot or vehicle traffic the area handles.
Solvent-based vs. water-based sealers
Both sealer types work on stamped concrete, but they are not interchangeable. Use the table below to match your situation to the right product:
| Factor | Solvent-based | Water-based |
|---|---|---|
| Color enhancement | Strong, deepens color | Mild enhancement |
| UV resistance | High | Moderate |
| Fume level | Strong, requires respirator | Low, better ventilation |
| Recoat compatibility | Must match existing sealer | More flexible |
| Best use | Pool decks, high-sun areas | Covered patios, low traffic |
If your existing sealer is solvent-based, apply only a solvent-based product over it. Mixing sealer types causes adhesion failure and peeling.
Match the finish to how the space gets used
Your finish choice affects both appearance and safety. A high-gloss finish looks sharp on decorative surfaces but gets slippery when wet, which is a real hazard on pool decks in Southwest Florida. Matte and satin finishes provide better grip while still enhancing the stamped pattern color. For driveways and walkways that handle foot traffic daily, a satin finish gives you the best balance of durability and traction.
Step 4. Apply the sealer for an even, durable coat
Application technique is where most DIY attempts at how to reseal stamped concrete fall apart. Applying too much product at once traps solvent vapor under the film, which causes bubbling and white haze that cannot be fixed without stripping everything back down. Work in thin, controlled layers and let each one cure before adding the next.
Use the right tool for your surface
Roller application works best on open, flat sections of stamped concrete. Use a 3/8-inch nap roller for most surfaces, and switch to a brush or foam applicator for tight edges, corners, and the deeper grooves of the stamped pattern. Pour the sealer into a tray rather than directly onto the surface, and maintain a wet edge as you work to avoid lap marks.
Apply sealer in the shade or during cooler morning hours. Direct sun heats the concrete surface and causes the sealer to dry too fast, which leads to uneven film formation and adhesion problems.
Apply two thin coats, not one thick coat
Each coat should be thin enough that you can see the roller marks level out within 30 seconds of application. Allow the first coat to dry until it is tacky but not wet, typically 60 to 90 minutes in Southwest Florida’s heat, then apply the second coat in the opposite direction to ensure complete, even coverage.
Keep it protected
Following the full process of how to reseal stamped concrete correctly gives your surface years of added life, but the work does not stop after the sealer dries. Rinse the surface with a garden hose every few weeks to clear pollen, dirt, and organic material before it breaks down the sealer film. Avoid using harsh chemical cleaners or metal tools on the surface, since both degrade the coating faster than normal wear.
Schedule a water bead test every six months so you catch sealer failure early and reseal before the concrete absorbs moisture and staining. In Southwest Florida’s climate, staying on a two-to-three year resealing cycle protects your investment and prevents the kind of deep surface damage that requires full grinding or replacement. If the job feels like more than you want to take on, or if you are dealing with significant cracking or peeling, the team at CHC Concrete is ready to handle it for you.