


Get the concrete driveway expansion joint spacing wrong, and you’ll watch cracks spread across your slab within a year or two, especially here in Southwest Florida, where heat expansion and sandy subgrade make proper joint placement non-negotiable. It’s one of those details that separates a driveway that lasts decades from one that starts failing before the sealer wears off.
The general rule is straightforward, but the details matter. Joint spacing depends on slab thickness, and there are a few additional factors, like climate, aggregate size, and pour conditions, that can shift the numbers. At CHC Concrete, we engineer every driveway pour in Fort Myers, Cape Coral, Estero, and Bonita Springs with these variables front of mind because our soil and weather punish shortcuts faster than most regions.
This article breaks down the standard rules of thumb for expansion and control joint spacing, explains why those guidelines exist, and covers the adjustments that apply to Florida driveways specifically. Whether you’re planning a new pour or trying to figure out why your current slab is cracking, you’ll leave with the technical knowledge to make informed decisions.
Why joint spacing matters in driveways
Concrete moves. It expands when temperatures rise, contracts when they drop, and shifts when the ground beneath it settles or saturates. Joint spacing in a driveway exists to give the slab controlled places to relieve that stress before it finds its own path, usually as a random crack across the surface.
What concrete movement actually looks like
Thermal expansion and contraction happen every single day in Florida. Your driveway absorbs intense UV radiation during the afternoon and cools overnight, cycling through that stress repeatedly across years. Sandy, unstable subgrade compounds the problem because the base under your slab can shift during heavy rain events or dry spells, adding vertical stress on top of the horizontal thermal stress.
Proper concrete driveway expansion joint spacing is not just about aesthetics – it is an engineering decision that determines how long your slab stays structurally intact.
Without correctly spaced joints, stress concentrates at the weakest points in the slab, which are almost always random locations rather than the edges you would prefer. Those cracks let moisture in, which accelerates spalling, undermines the base, and creates trip hazards.
Why Florida conditions raise the stakes
High ambient temperatures mean your concrete experiences more dramatic daily thermal cycles than slabs poured in cooler northern climates. Southwest Florida averages over 260 sunny days per year, and concrete surfaces regularly reach temperatures well above air temperature on a clear afternoon. That daily expansion and contraction accumulates stress over time.
Heavy seasonal rainfall also saturates the sandy soils common in Fort Myers and Cape Coral quickly. Saturated ground shifts under load, and a slab with poor joint placement has no relief mechanism when the subgrade moves, so it cracks instead.
Control joints vs expansion joints
These two terms get used interchangeably, but they serve different mechanical functions in your slab. Understanding the difference helps you see why concrete driveway expansion joint spacing guidelines specify each type separately and why skipping one or the other leads to visible damage.
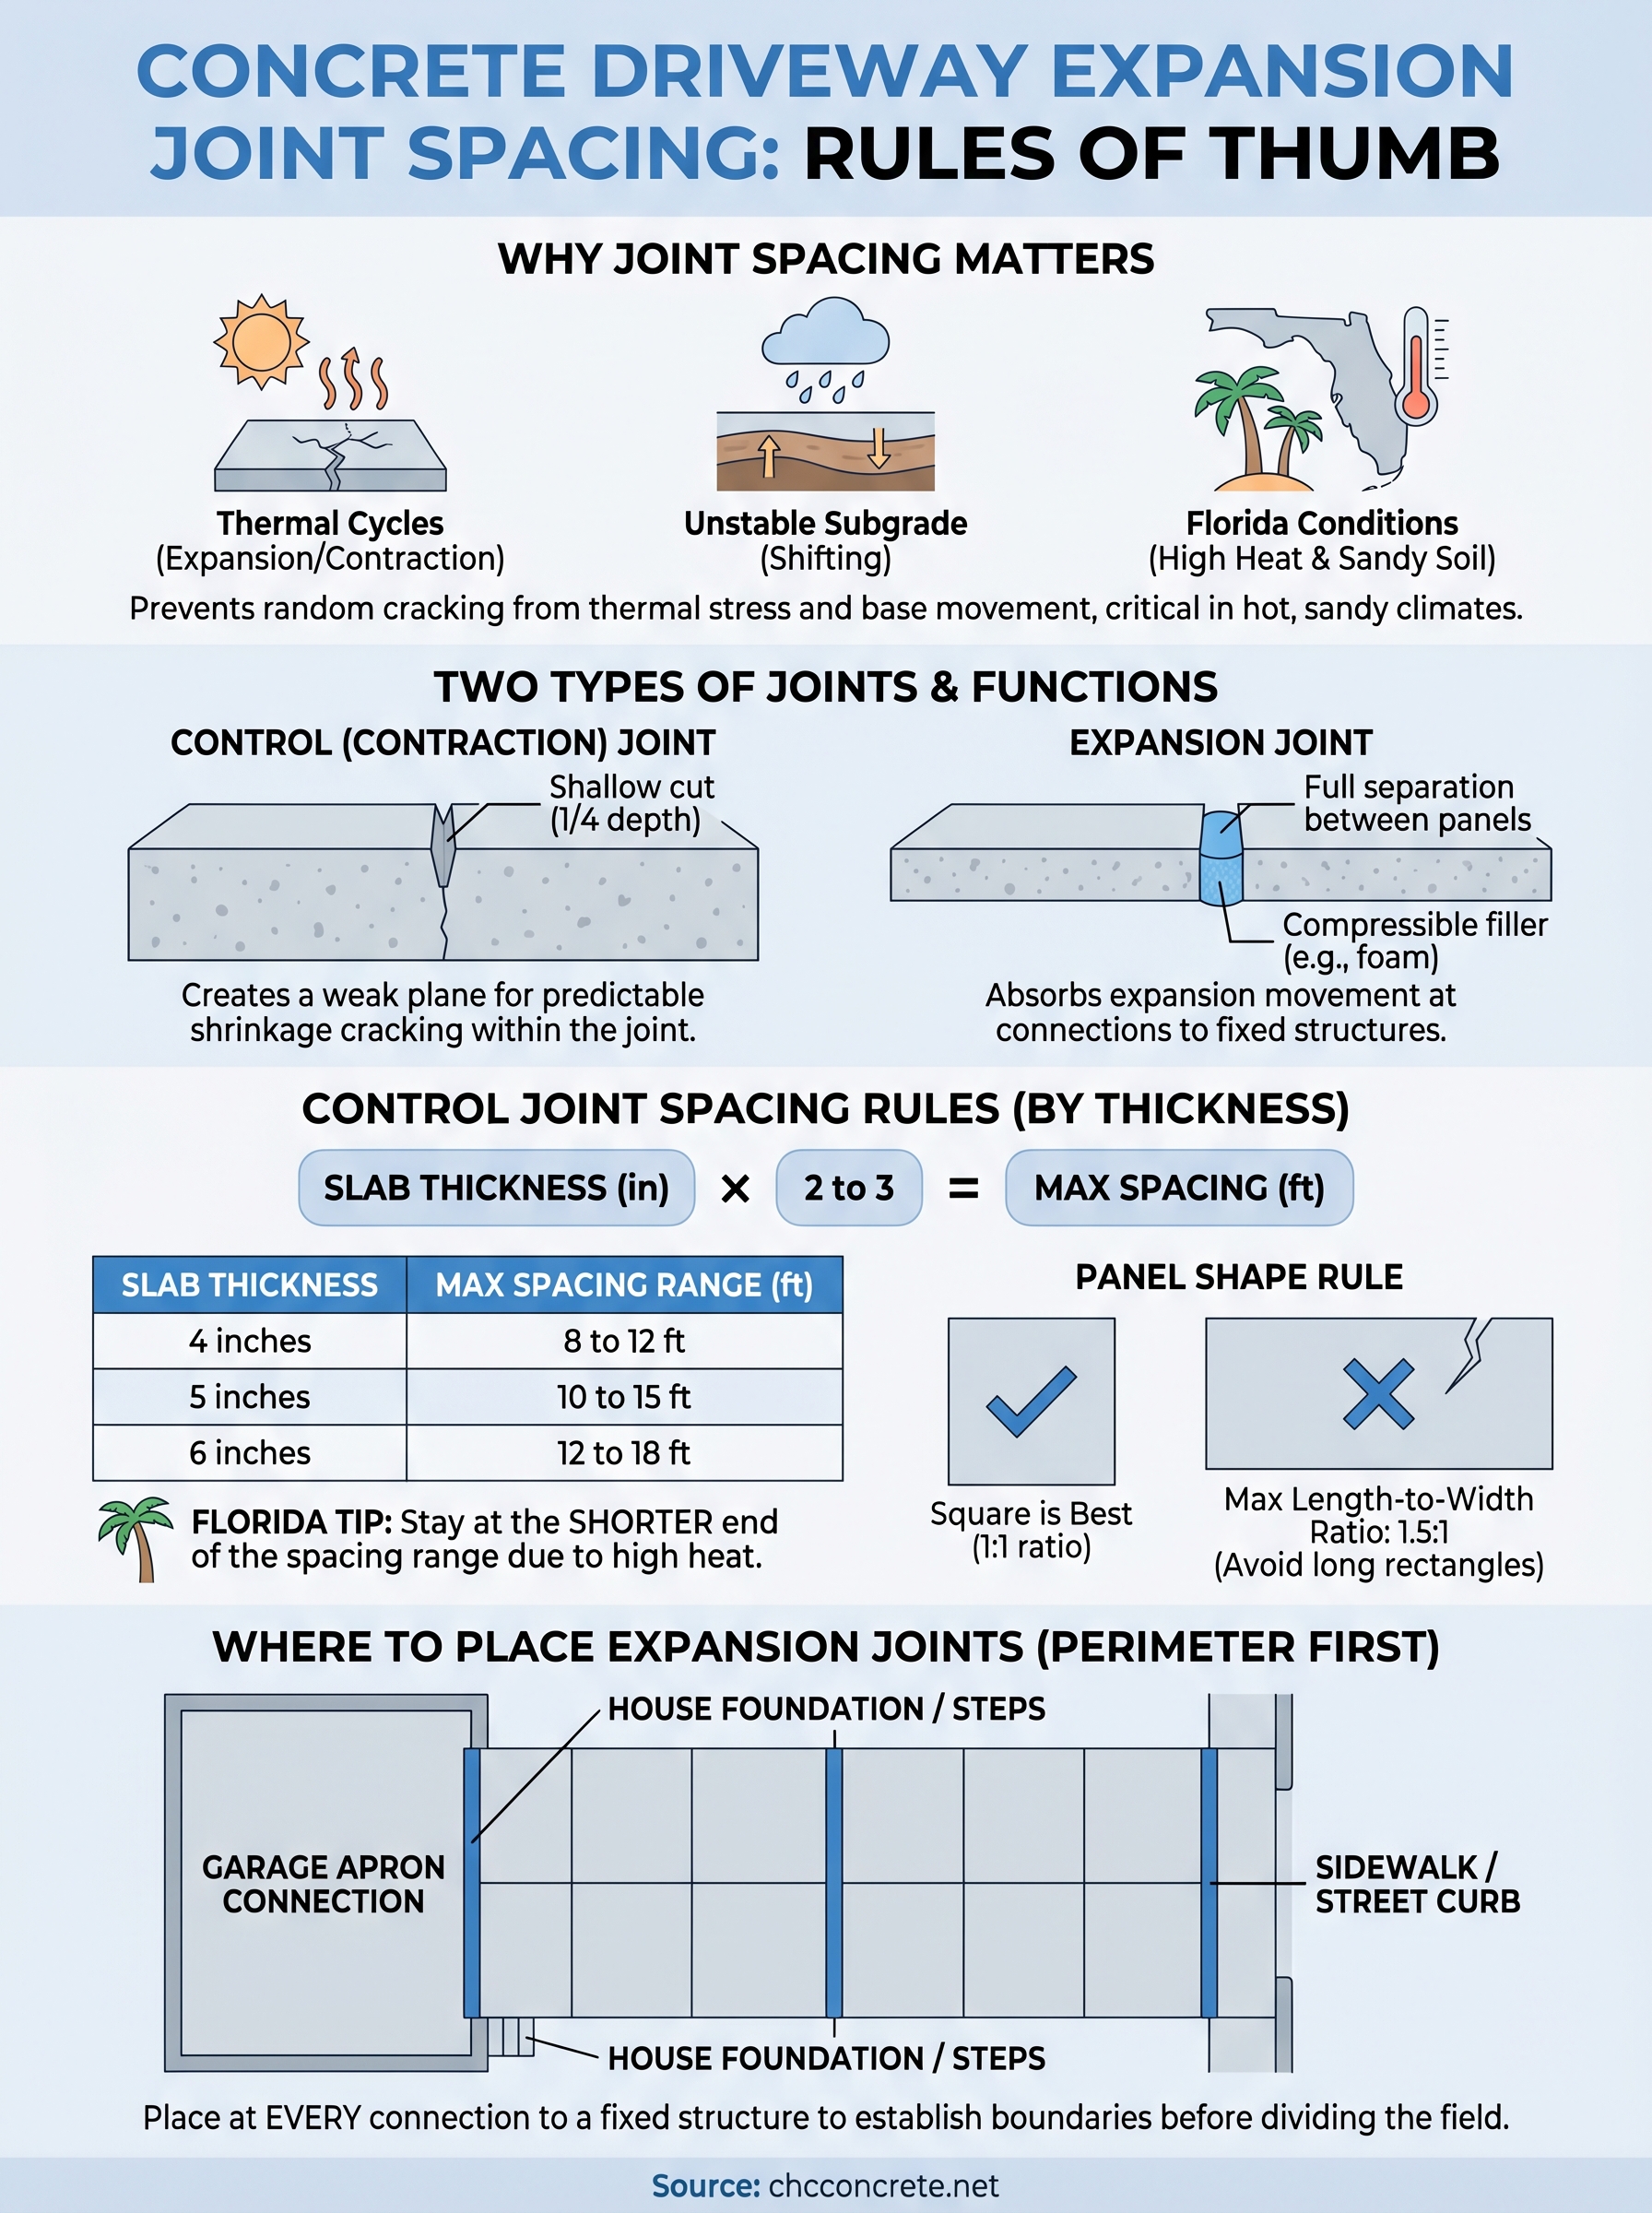
Control joints (contraction joints)
Control joints are shallow cuts or tooled grooves placed into the top of the slab, typically one-quarter of the slab’s depth. Their job is to create a weak plane where the concrete cracks in a straight, predictable line as it shrinks during curing and seasonal contraction, keeping that crack hidden inside the joint rather than running visibly across your surface.
Common control joint methods include:
- Tooled joints: formed while the concrete is still wet using a hand groover
- Saw-cut joints: cut with a concrete saw within 12 to 24 hours after the pour
Expansion joints
Expansion joints fully separate two concrete sections, using a compressible material like foam backer rod or rubber to fill the gap. When your slab expands due to heat, that compressible filler absorbs the movement rather than pushing force into an adjacent fixed structure.
Skipping expansion joints where your driveway meets a garage apron, sidewalk, or street almost always produces edge cracking within the first few Florida summers.
Rules of thumb for joint spacing by slab thickness
The standard industry guideline ties control joint spacing directly to your slab thickness: space joints no further apart in feet than 2 to 3 times the slab thickness in inches. A 4-inch residential driveway slab should have control joints every 8 to 12 feet in both directions.
The core spacing formula
Slab thickness drives the calculation, but keeping individual panels close to square matters just as much. Your length-to-width ratio should stay at or below 1.5:1, because rectangular panels tend to crack diagonally across the long dimension under thermal and load stress.
| Slab Thickness | Maximum Joint Spacing |
|---|---|
| 4 inches | 8 to 12 feet |
| 5 inches | 10 to 15 feet |
| 6 inches | 12 to 18 feet |
For concrete driveway expansion joint spacing in Florida, stay toward the shorter end of each range to offset the extra thermal stress your slab accumulates year-round.
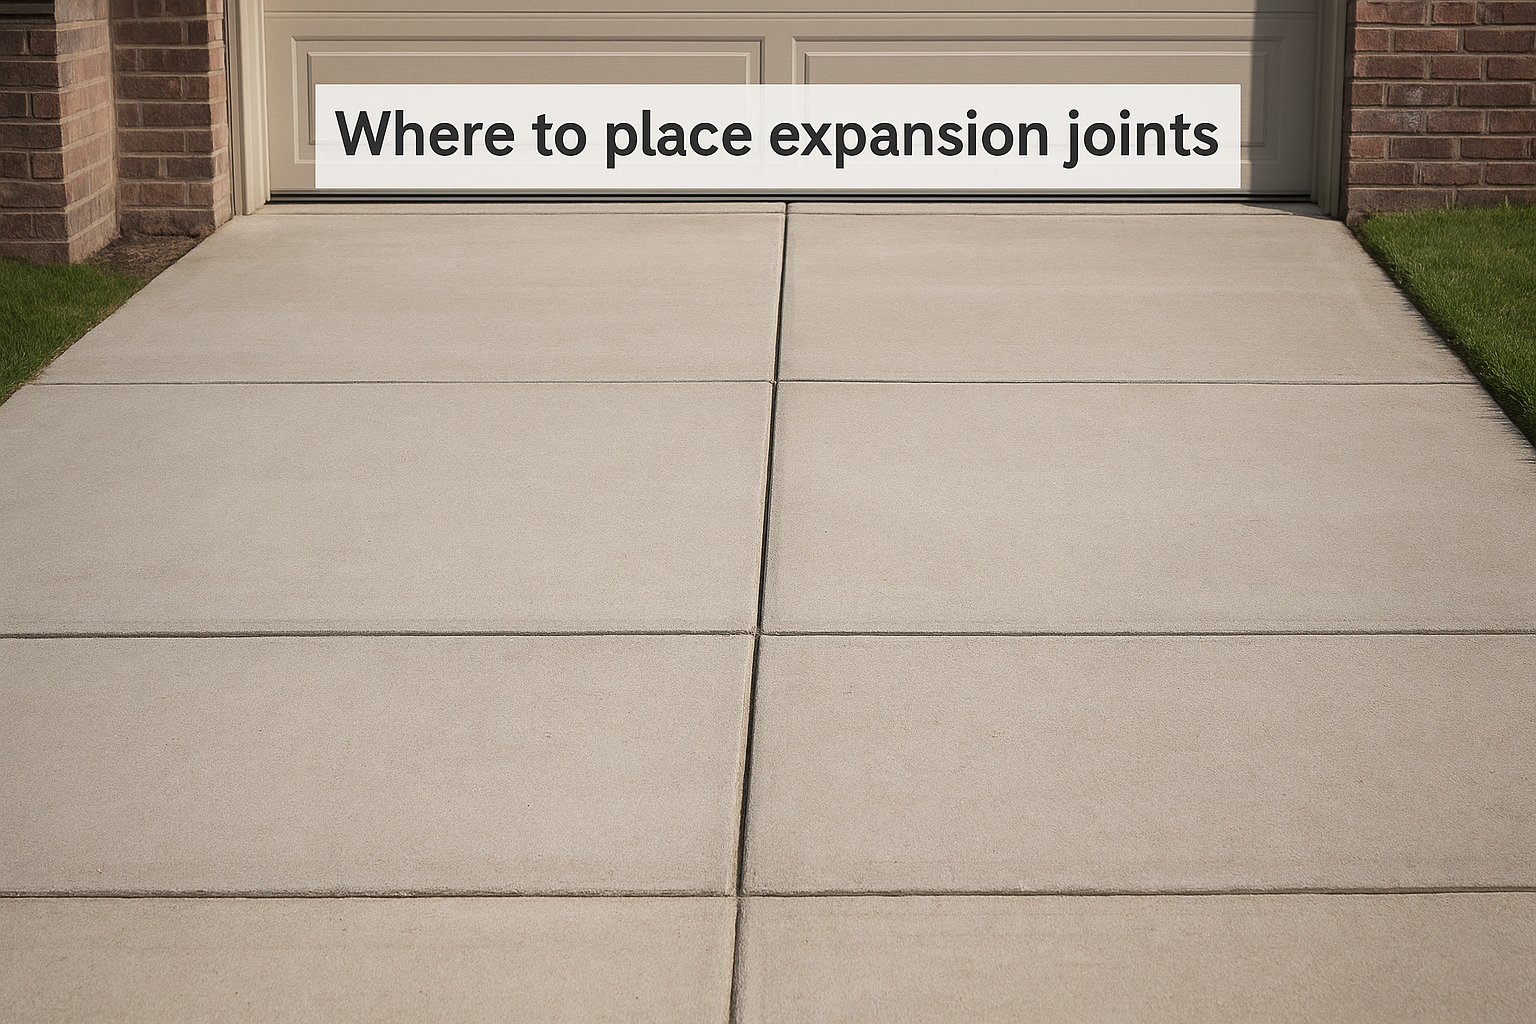
Where to place expansion joints
Expansion joints belong wherever your slab meets any fixed structure. Place them at every transition point, regardless of how far that location sits from your last control joint.
Common locations that require expansion joints:
- Garage apron and driveway slab connection
- Public sidewalks and street curbs
- Adjacent building foundations
- Steps or stoops attached to the driveway
How to lay out joints on a typical driveway
Starting with a clear layout plan before the pour saves you from guessing where joints belong once the concrete is already setting. Most residential driveways follow a straightforward geometry, and mapping joint locations in advance lets your crew work efficiently and consistently from the first section to the last.
Start with the perimeter
Place expansion joints first at every point where your driveway meets a fixed structure. These perimeter joints establish your fixed boundaries and give you a logical starting reference for spacing control joints across the remaining slab.
Common perimeter locations that require expansion joints:
- Garage apron connection
- Public sidewalk and street curb
- Building foundation or attached steps
Divide the field into panels
Once your perimeter expansion joints are set, divide the remaining slab into panels using the thickness-based spacing rule. Aim to keep each panel close to square, with a length-to-width ratio no greater than 1.5:1. For a standard 4-inch residential driveway, that means placing control joints every 8 to 10 feet in both directions across the slab.
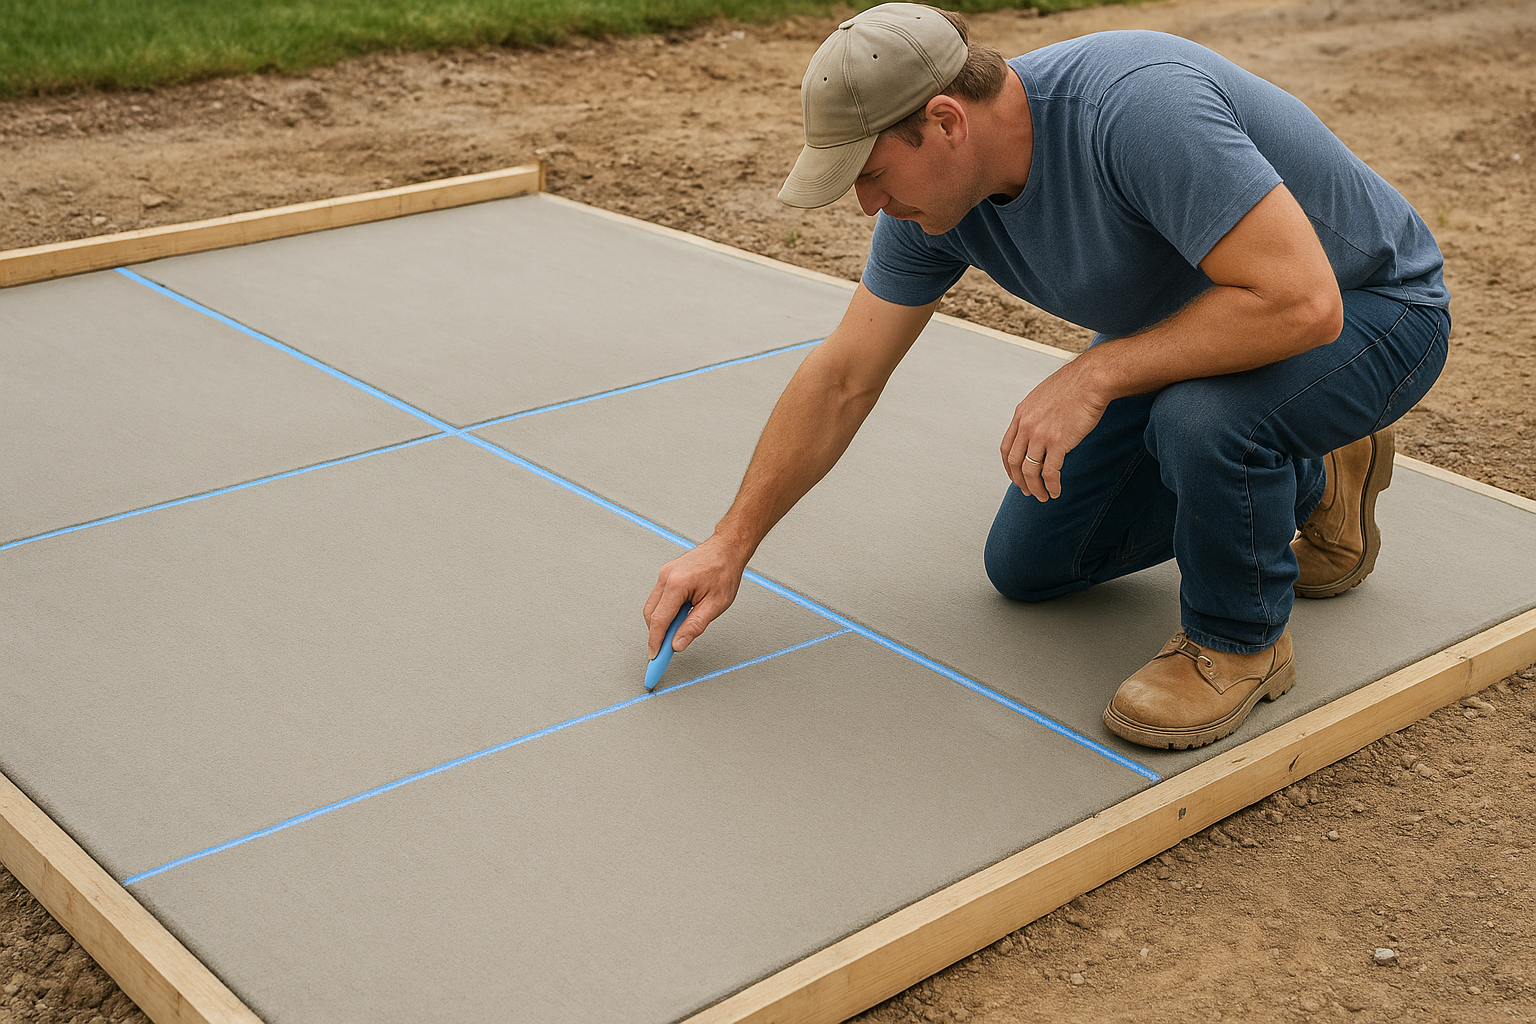
Sketch your concrete driveway expansion joint spacing on paper before the crew arrives so everyone agrees on panel dimensions before the pour begins.
Mark joint lines with chalk on the subgrade or forms ahead of time so the spacing stays consistent even as the pour moves quickly.
Common mistakes and Florida-specific tips
Even experienced crews make joint placement errors that show up as cracks within a season or two. Knowing the most common mistakes helps you ask better questions before your contractor pours a single yard.
Mistakes that shorten slab life
Skipping joints at structure connections is the single most damaging error on residential driveways. Your garage apron, sidewalk edge, and foundation all move independently from your driveway slab, so any fixed connection transfers stress directly into the concrete. Spacing control joints too far apart is equally common, particularly on wider driveways where crews try to minimize cuts and save time.
Getting concrete driveway expansion joint spacing right at the planning stage costs nothing extra, but fixing cracked panels after the fact costs significantly more.
Florida-specific adjustments to make
High ground temperatures in Southwest Florida mean your slab surface regularly hits temperatures far above what the spacing formulas assume for temperate climates. Staying at the shorter end of every spacing range compensates for the added thermal stress your driveway absorbs year-round. Sandy subgrade in Fort Myers and Cape Coral also drains and shifts seasonally, so ask your contractor to verify base compaction depth before the pour starts.
Next steps for your driveway
Getting concrete driveway expansion joint spacing right starts before the first yard of concrete arrives on site. Review your slab’s planned thickness, sketch out your panel layout using the spacing rules in this article, and confirm that expansion joints are planned at every structure connection point. These decisions cost nothing to make in advance and can prevent hundreds or thousands of dollars in repairs later.
If your current driveway is already showing cracks, the damage tells you where the joint layout failed. Random diagonal cracks across a panel point to oversized spacing, while edge cracking near your garage or sidewalk usually means expansion joints were skipped or undersized. Both problems are repairable, but catching them early limits how far the damage spreads.
For a free on-site estimate from a licensed contractor who understands Southwest Florida’s soil and climate conditions, contact the team at CHC Concrete today.