


Allan Block is one of the most widely used retaining wall systems on the market, and for good reason. The pinned, mortarless design makes it accessible for DIY homeowners while still meeting the structural demands that professionals require. But whether you’re building a small garden wall or a multi-tiered structure, a solid Allan Block retaining wall installation guide matters more than the blocks themselves. Skip a step in base preparation or drainage, and you’ll watch your wall lean, shift, or fail within a few years.
At CHC Concrete, we’ve built and repaired retaining walls across Fort Myers, Cape Coral, Estero, and Bonita Springs, many of them on sandy Southwest Florida soil that doesn’t forgive shortcuts. We know what holds up here and what doesn’t.
This guide walks you through the full process from start to finish: planning, materials, base prep, block laying, drainage, and cap installation. Whether you’re doing this yourself or hiring a contractor and want to understand what proper installation looks like, you’ll have everything you need. We’ve also included notes on common mistakes we see in the field so you can avoid the problems that lead to costly repairs down the road.
Before you start: rules, tools, and materials
Before you touch a shovel, check your local building codes. In Southwest Florida, retaining walls over 30 inches in height typically require a permit, and municipalities like Cape Coral have specific setback rules from property lines and drainage easements. Call your county building department before you dig. If you’re hiring a contractor, confirm the permit is pulled under their license, not left as your responsibility.
Skipping the permit step can mean tearing out a finished wall if an inspector flags it during a home inspection or neighboring project.
Tools you’ll need
You don’t need specialized equipment for a standard residential wall, but having the right tools ready on site before you start saves multiple trips and keeps your project on schedule. Most of these you already own or can rent from a local equipment supplier:
- Tape measure and string line for layout
- Hand tamper or plate compactor (rent one for larger projects)
- Level and rubber mallet
- Shovel and pickaxe for excavation
- Wheelbarrow for moving base material
- Safety glasses and work gloves
Materials list
Your quantities depend on wall length, height, and the number of tiers, but every project covered in this allan block retaining wall installation guide requires the same core set of materials. Plan for all of these before your first block goes in:
- Allan Block units (standard or AB Jumbo depending on wall height)
- Crushed stone base material (road base or compactable gravel, 6 inches minimum)
- Wall rock (clean washed aggregate for drainage behind the wall)
- Geogrid (required for walls over 3 to 4 feet tall)
- Perforated drain pipe
- Cap blocks
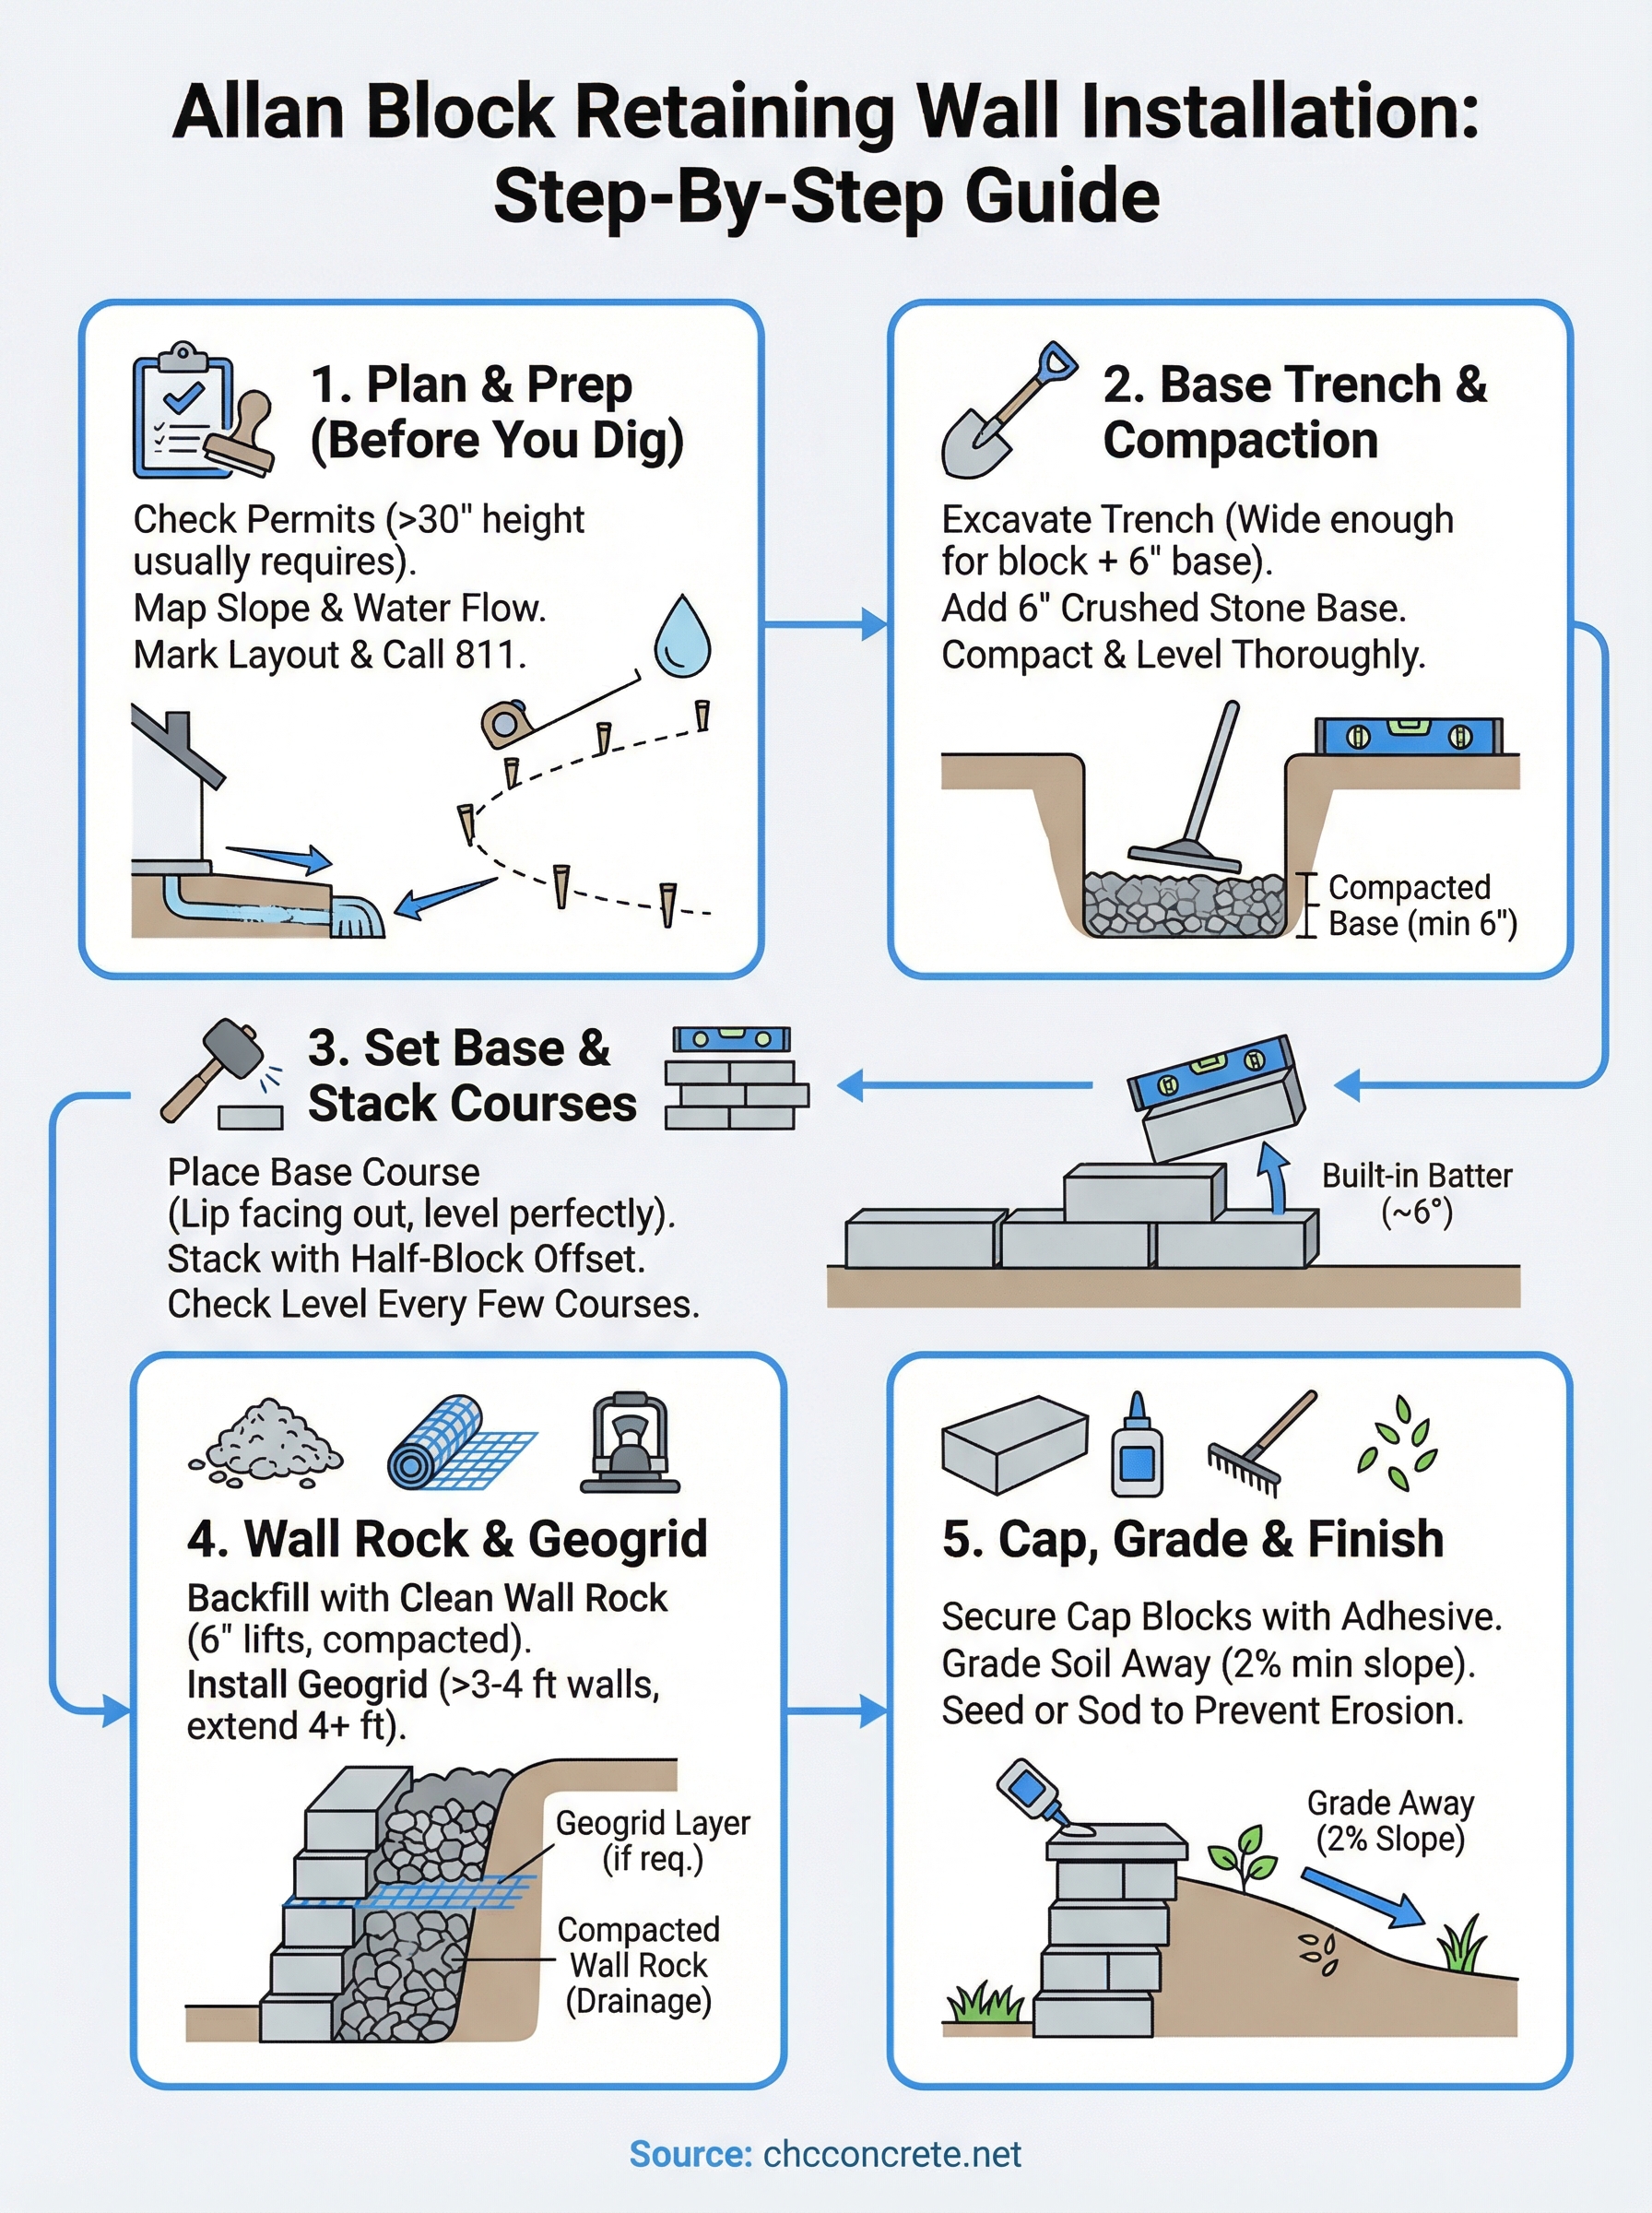
Step 1. Plan the wall layout and drainage
Planning starts on the ground, not on paper. Mark your wall footprint with stakes and string line, then look at where water flows when it rains hard. In Southwest Florida, hydrostatic pressure from trapped water is the number one reason retaining walls lean or crack within the first few years.
Map your slope and water flow
Walk your yard and note where water pools after a storm. Measure the total rise from the base to the top of the slope to figure out your course count. A standard rule in this allan block retaining wall installation guide is to bury one foot of block below grade for every foot of exposed wall height.
In flat Southwest Florida lots, even a 2-foot rise can create serious drainage challenges. Plan your outlet for the perforated drain pipe before you break ground.
| Exposed wall height | Buried base depth | Geogrid required? |
|---|---|---|
| Up to 2 ft | 6 inches | No |
| 2 to 4 ft | 12 inches | Recommended |
| Over 4 ft | 12 inches+ | Yes |
Mark setbacks and utility lines
Call 811 before any excavation to locate buried utility lines. Then confirm your wall clears the local setback requirements from property lines and drainage easements before you commit to a final layout.
Step 2. Excavate and build the base trench
Start by removing all vegetation, roots, and soft soil from the trench area. Your trench needs to be wide enough to fit the full block depth plus 6 inches of crushed stone base on all sides. For a standard Allan Block unit, plan for roughly 24 inches wide and 12 to 18 inches deep based on your wall height.
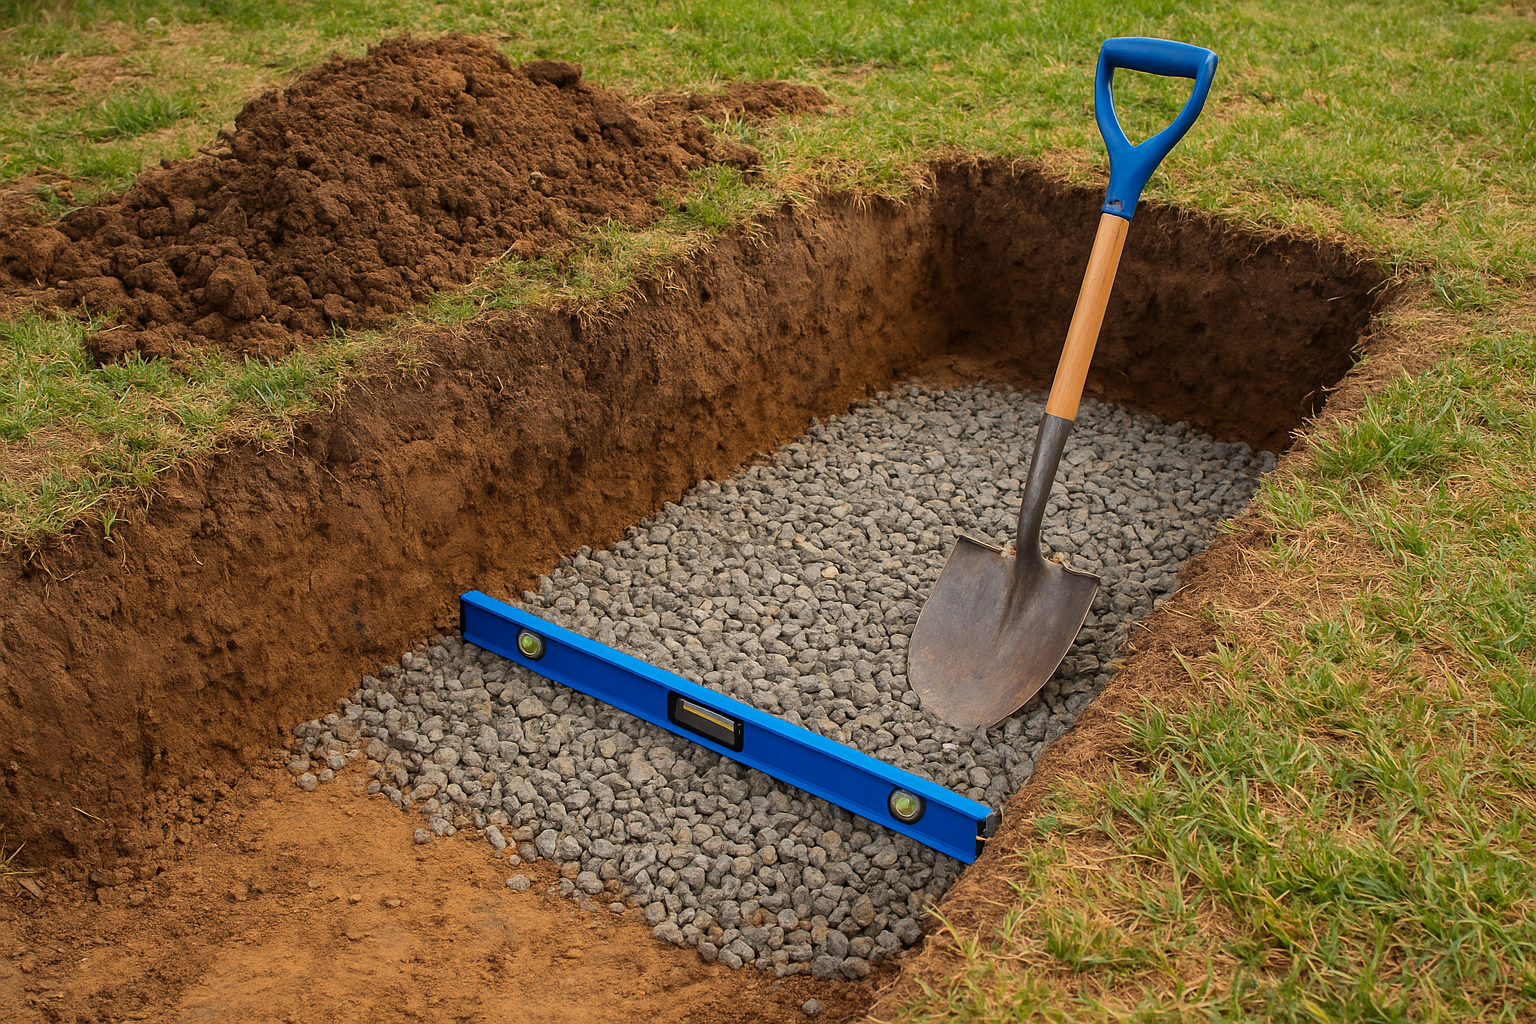
Compact the base material
Once you reach firm, undisturbed soil, add crushed stone base in 3-inch layers and compact each one before adding the next. Sandy Southwest Florida soil shifts under load, so skipping compaction in this allan block retaining wall installation guide means your wall will lean or settle within a season or two.
If your base soil stays soft past 18 inches, dig deeper and add compacted road base before starting your gravel layer.
Finish by checking the full trench bottom for level before placing any block. Run a 4-foot level across the compacted gravel to catch low spots now, before your base course is locked in.
Step 3. Set the base course and stack courses
The base course is the most critical row you’ll lay in this entire process. Place each Allan Block unit on the compacted gravel bed with the front lip facing outward, then check it for level in both directions with your 4-foot level. Use your rubber mallet to tap blocks into final position before moving on. Any error here multiplies across every row you stack above it.
Staggering joints and maintaining batter
Every course above the base follows a half-block offset pattern, meaning each block spans the joint directly below it. This stagger is what gives the wall its structural strength under lateral soil pressure. Allan Block units also have a built-in batter of roughly 6 degrees, so each course steps slightly back into the slope as you stack higher, which is by design in this allan block retaining wall installation guide.
Never stack courses without checking level every 4 to 6 blocks. A small tilt compounds fast and forces you to tear down completed rows.
Keep a string line set at each course height to maintain consistent horizontal alignment across the full wall length.
Step 4. Add wall rock, compaction, and geogrid
Once your stacked courses are level and aligned, backfill directly behind the wall with clean washed wall rock, not native soil. Wall rock allows water to drain freely through the wall system instead of building up hydrostatic pressure. In Southwest Florida’s sandy, rain-heavy conditions, skipping wall rock is the fastest way to undermine your investment.
Pack wall rock in 6-inch lifts and compact each layer before adding the next one.
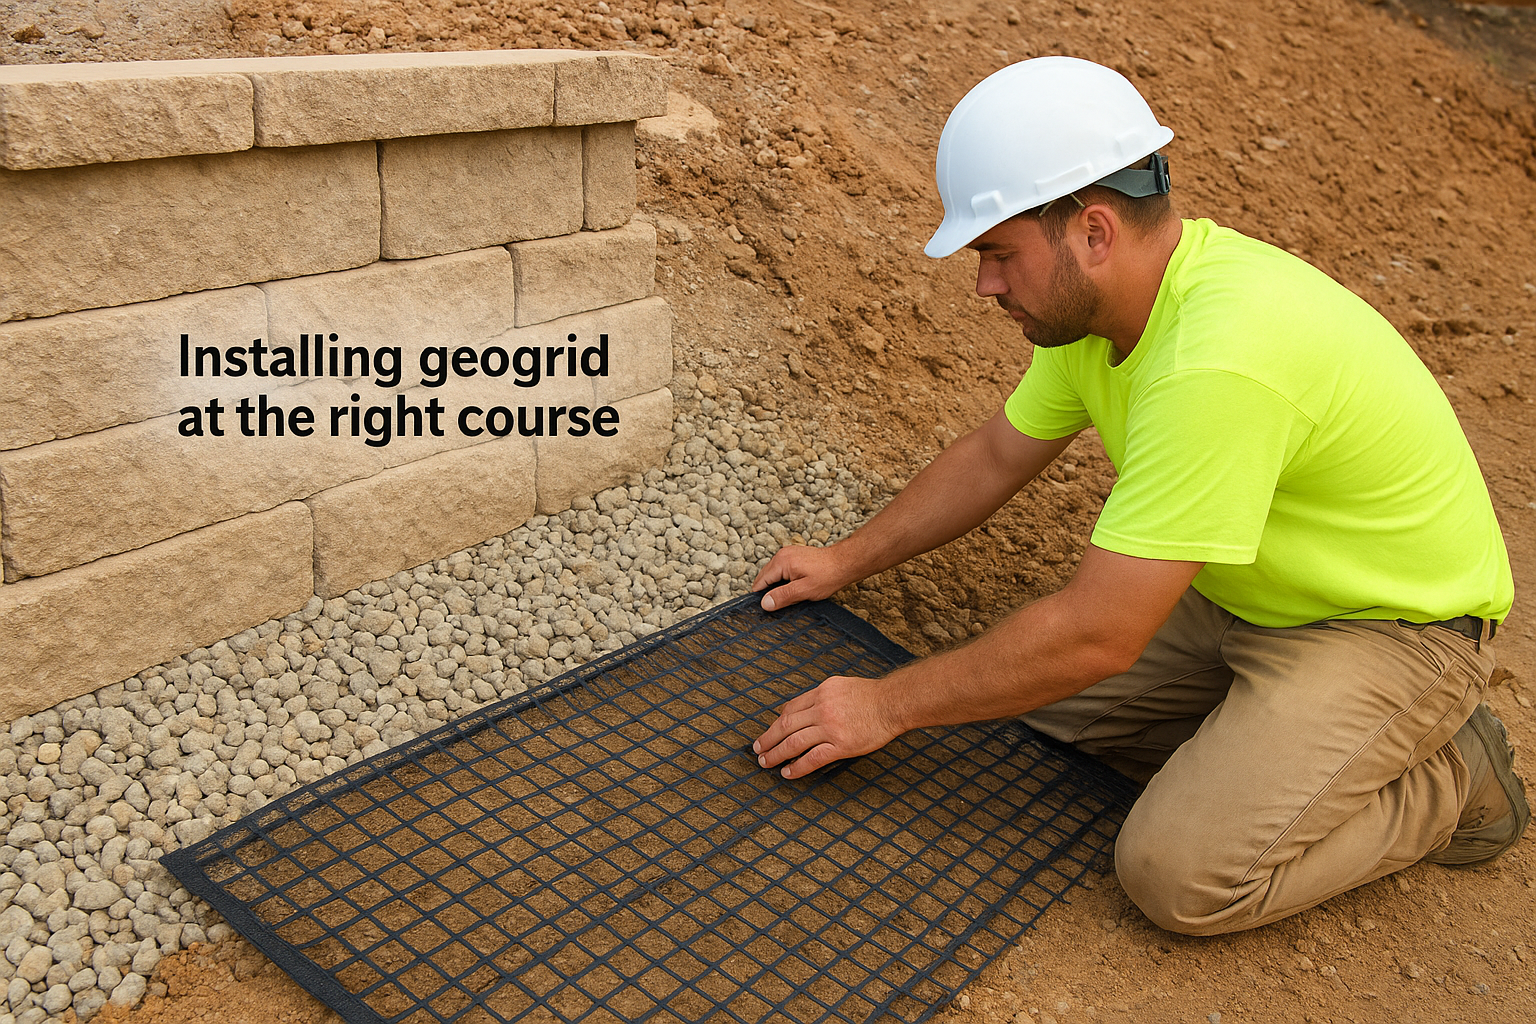
Installing geogrid at the right course
For any wall over 3 feet tall, this allan block retaining wall installation guide requires geogrid at specific intervals, typically every two to three courses depending on wall height. Lay the geogrid flat on a compacted wall rock layer, extend it back into the slope a minimum of 4 feet, and fold the tail end under the next course of block before stacking. Keep it taut and free of wrinkles so it locks into the surrounding fill without bunching.
| Wall height | Geogrid layers | Minimum extension |
|---|---|---|
| 2 to 3 ft | 1 | 3 ft |
| 3 to 4 ft | 2 | 4 ft |
| Over 4 ft | 3+ | 5 ft |
Step 5. Cap, grade, and finish the top
Cap blocks lock the top course in place and give the wall a clean, finished edge. Place each cap block with construction adhesive applied directly to the top course of standard blocks before setting them. Press each cap firmly into position and check alignment with your string line as you go. In this allan block retaining wall installation guide, caps serve a structural role, not just a decorative one, so never skip the adhesive step.
Grade and seed the backfill area
Once caps are set, grade the soil behind the wall so it slopes away from the structure at a minimum pitch of 2 percent. This directs surface water toward your planned drainage outlet instead of pooling against the wall face.
Flat or inward-sloping grades will force water to find a path through or under the wall, undoing the drainage work from the previous steps.
Seed or sod the disturbed area promptly to prevent erosion from washing fill material back against the base of the wall. Bare soil left exposed through a rainy season will undermine your backfill faster than most homeowners expect.
You’re ready to build
You now have everything covered in this allan block retaining wall installation guide to build a wall that holds up under Southwest Florida’s conditions. From base trench depth to geogrid placement to cap adhesive, each step connects directly to long-term structural performance.
If your project involves walls over 4 feet, multiple tiers, or drainage-sensitive areas near your home’s foundation, hiring a licensed concrete contractor is the right call. Mistakes at the base course or in geogrid installation are expensive to fix once you’ve backfilled and capped. Getting it right the first time costs less than tearing it down and starting over.
For homeowners in Fort Myers, Cape Coral, Estero, or Bonita Springs who want a professional to handle the installation, contact CHC Concrete for a free estimate. We’ll inspect your site and review your drainage conditions before work starts so you know exactly what you’re getting.